
DIY Painted Swing Set
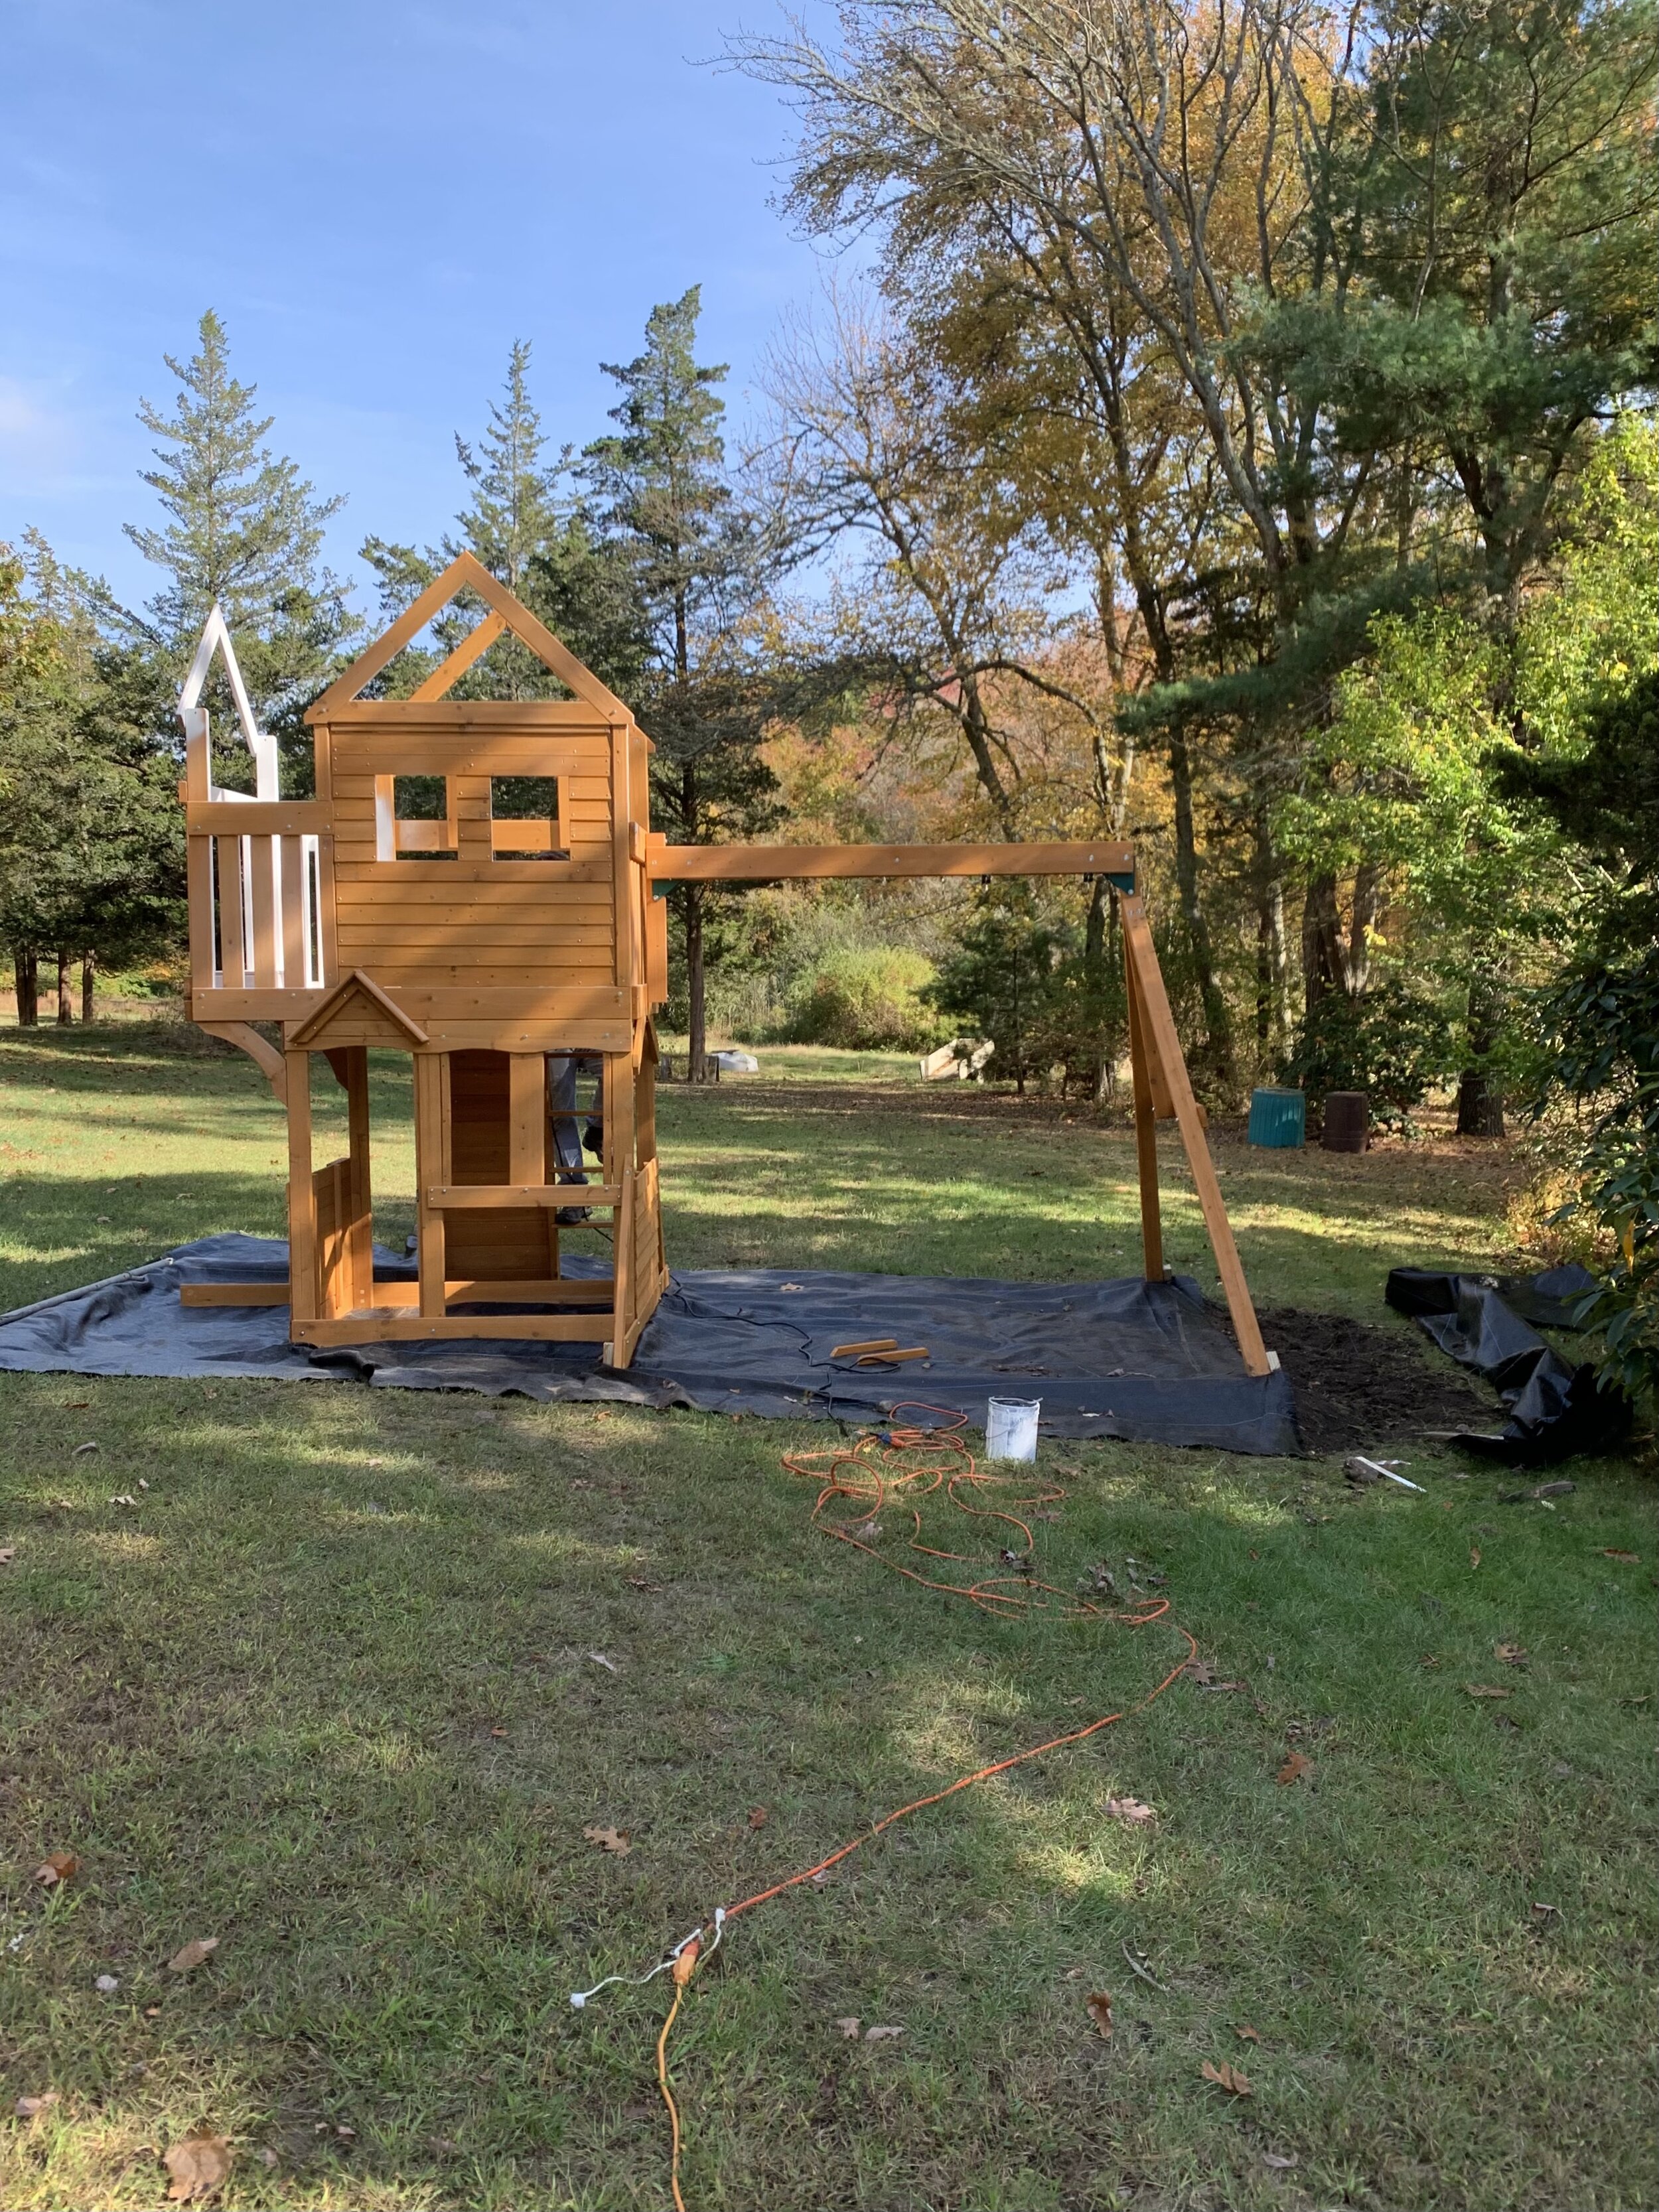
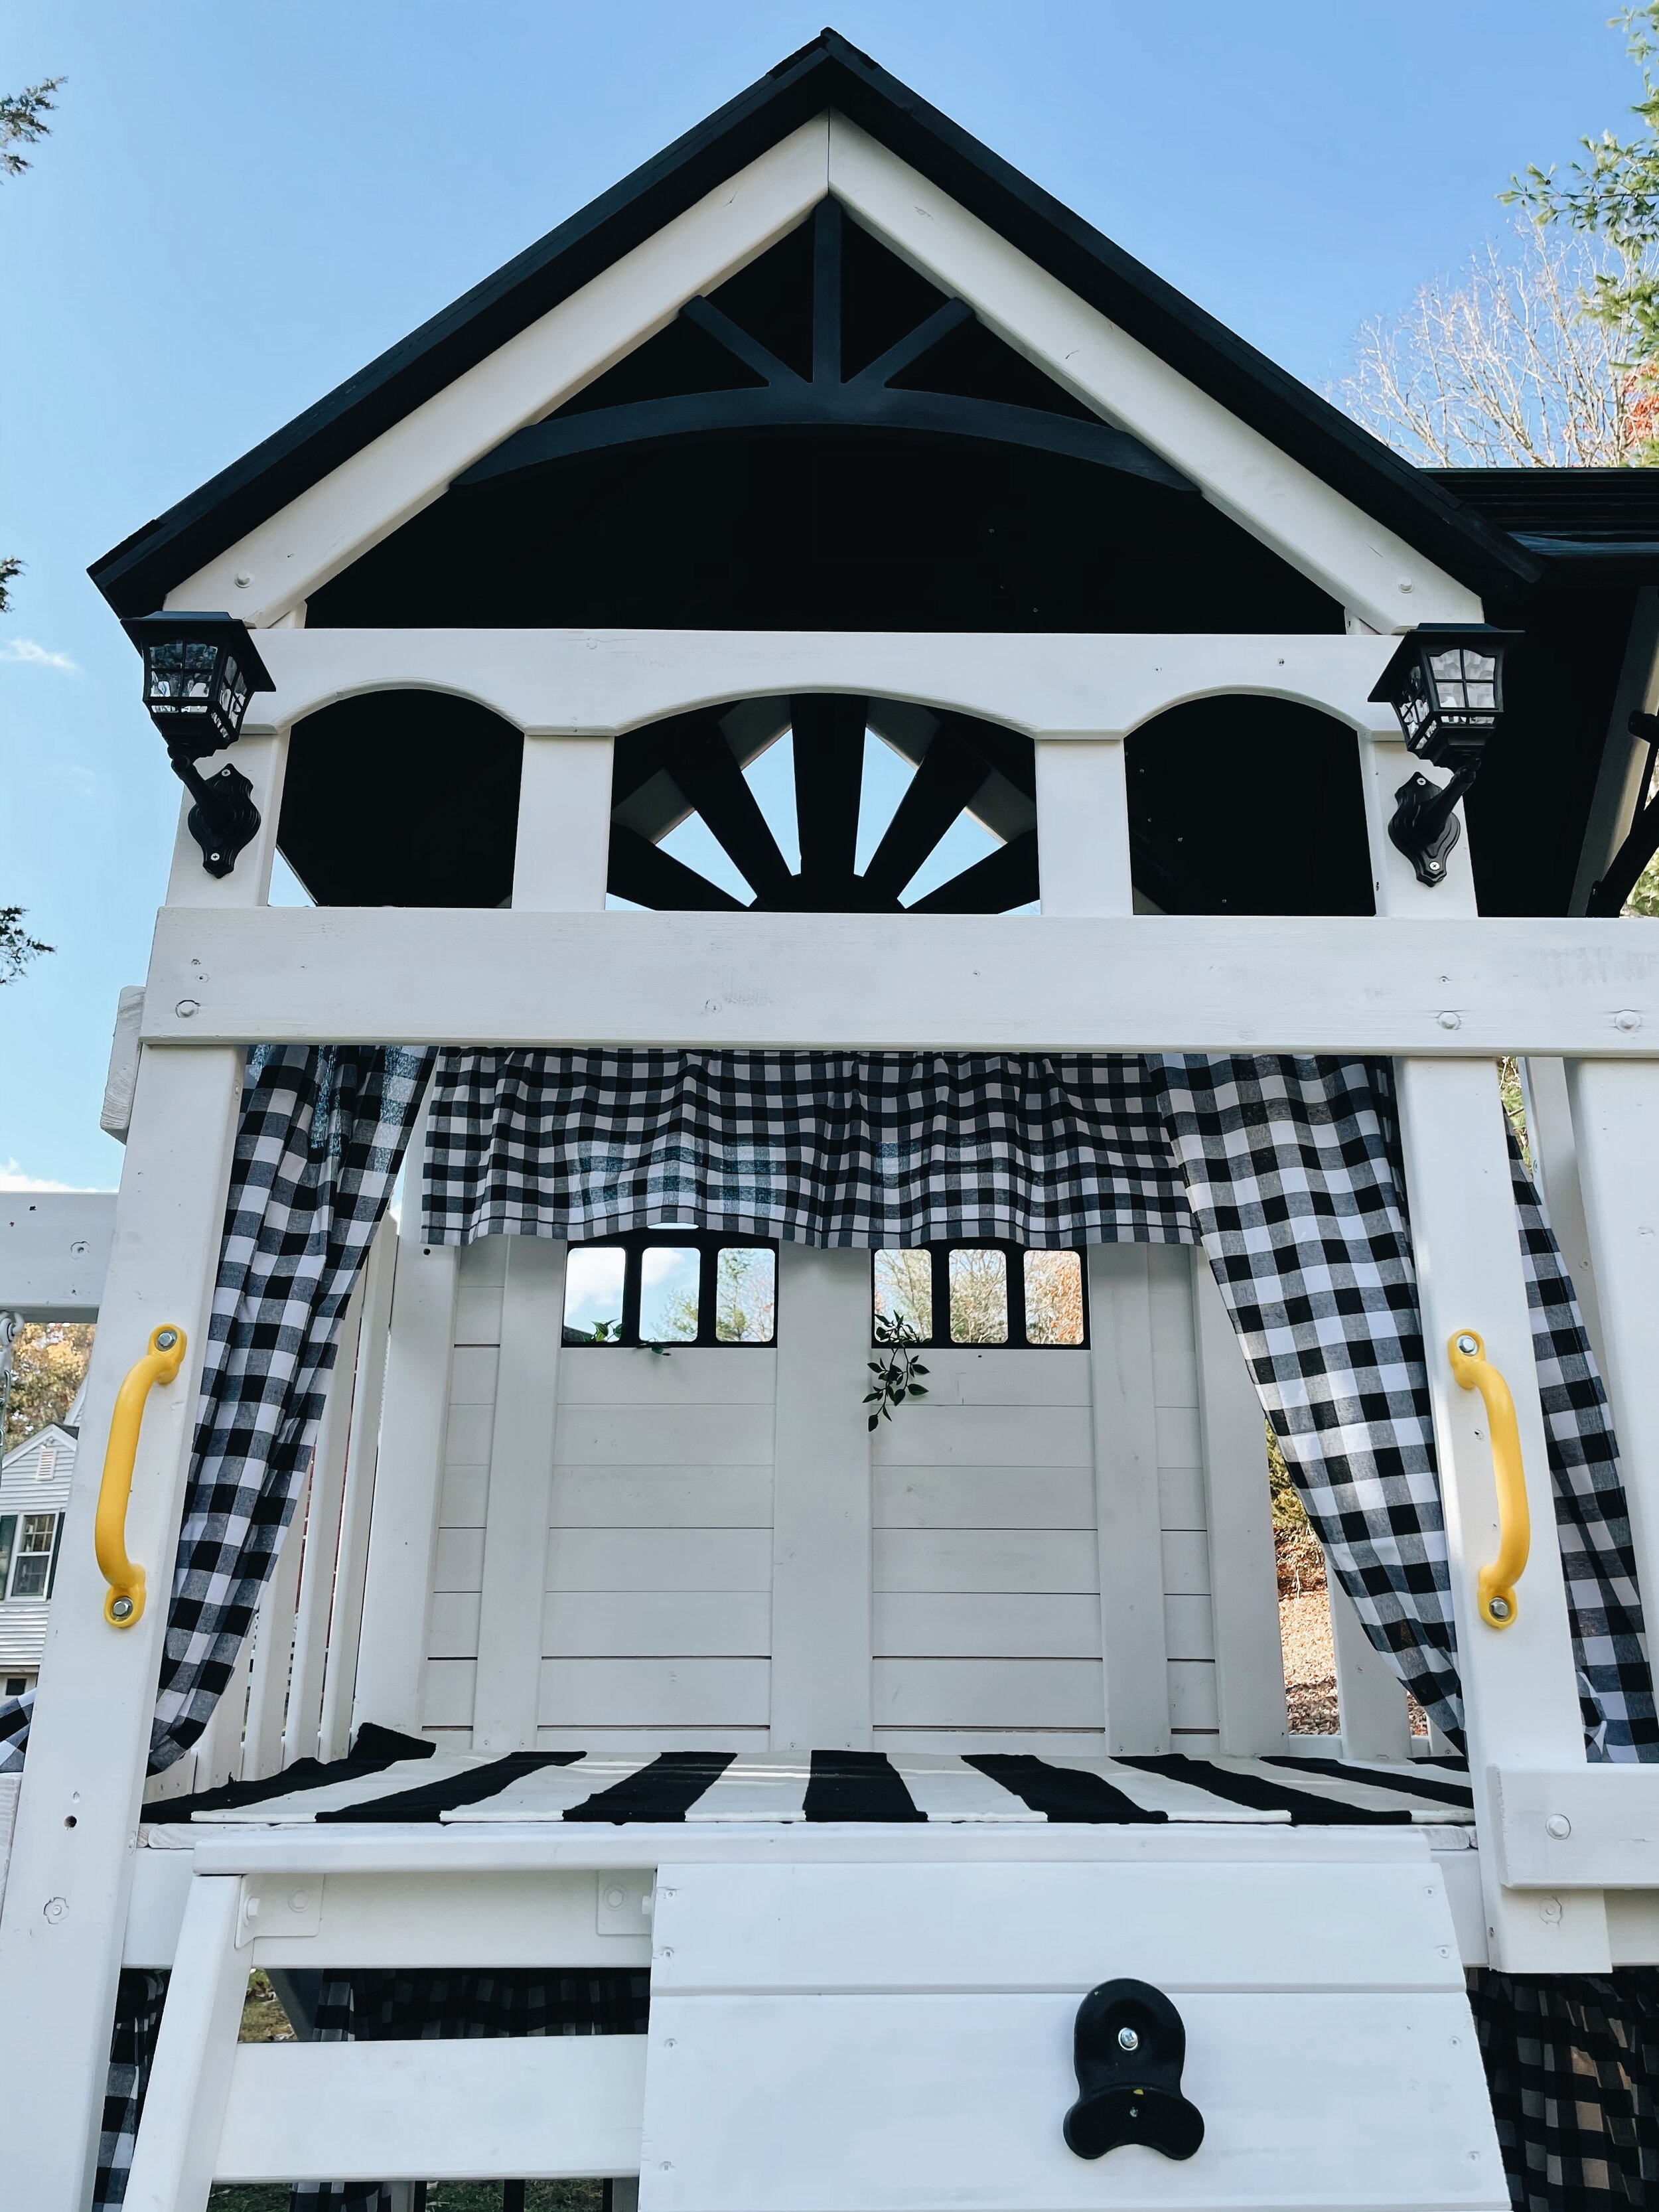
Since our move, we have been spending a lot of time in our new yard. I wanted to get little ones a new swing set and I had a very particular vision in mind for it! I knew that I the slide and swings were important, but I wanted it to also have a playhouse aspect to it, because Thea loves pretend play. I found the perfect one for us at KidKraft! It is called the Boulder Station Swing Set/ Playset. I has two swings, a glider, a covered slide and a cute two story playhouse with a rock wall ladder! The set itself is made out of a high quality orange-toned cedar with green and yellow accents, but I really wanted black and white, so we painted it!!!

This was a super big project that took us a few weeks to do! The assembly for the KidKraft swing set said it would take two people 8-10 hours. Well, It took us a solid 35 to construct this thing, and then another 5 hours of painting! I am so glad that we put in the work though, because I am so happy with the finished product!
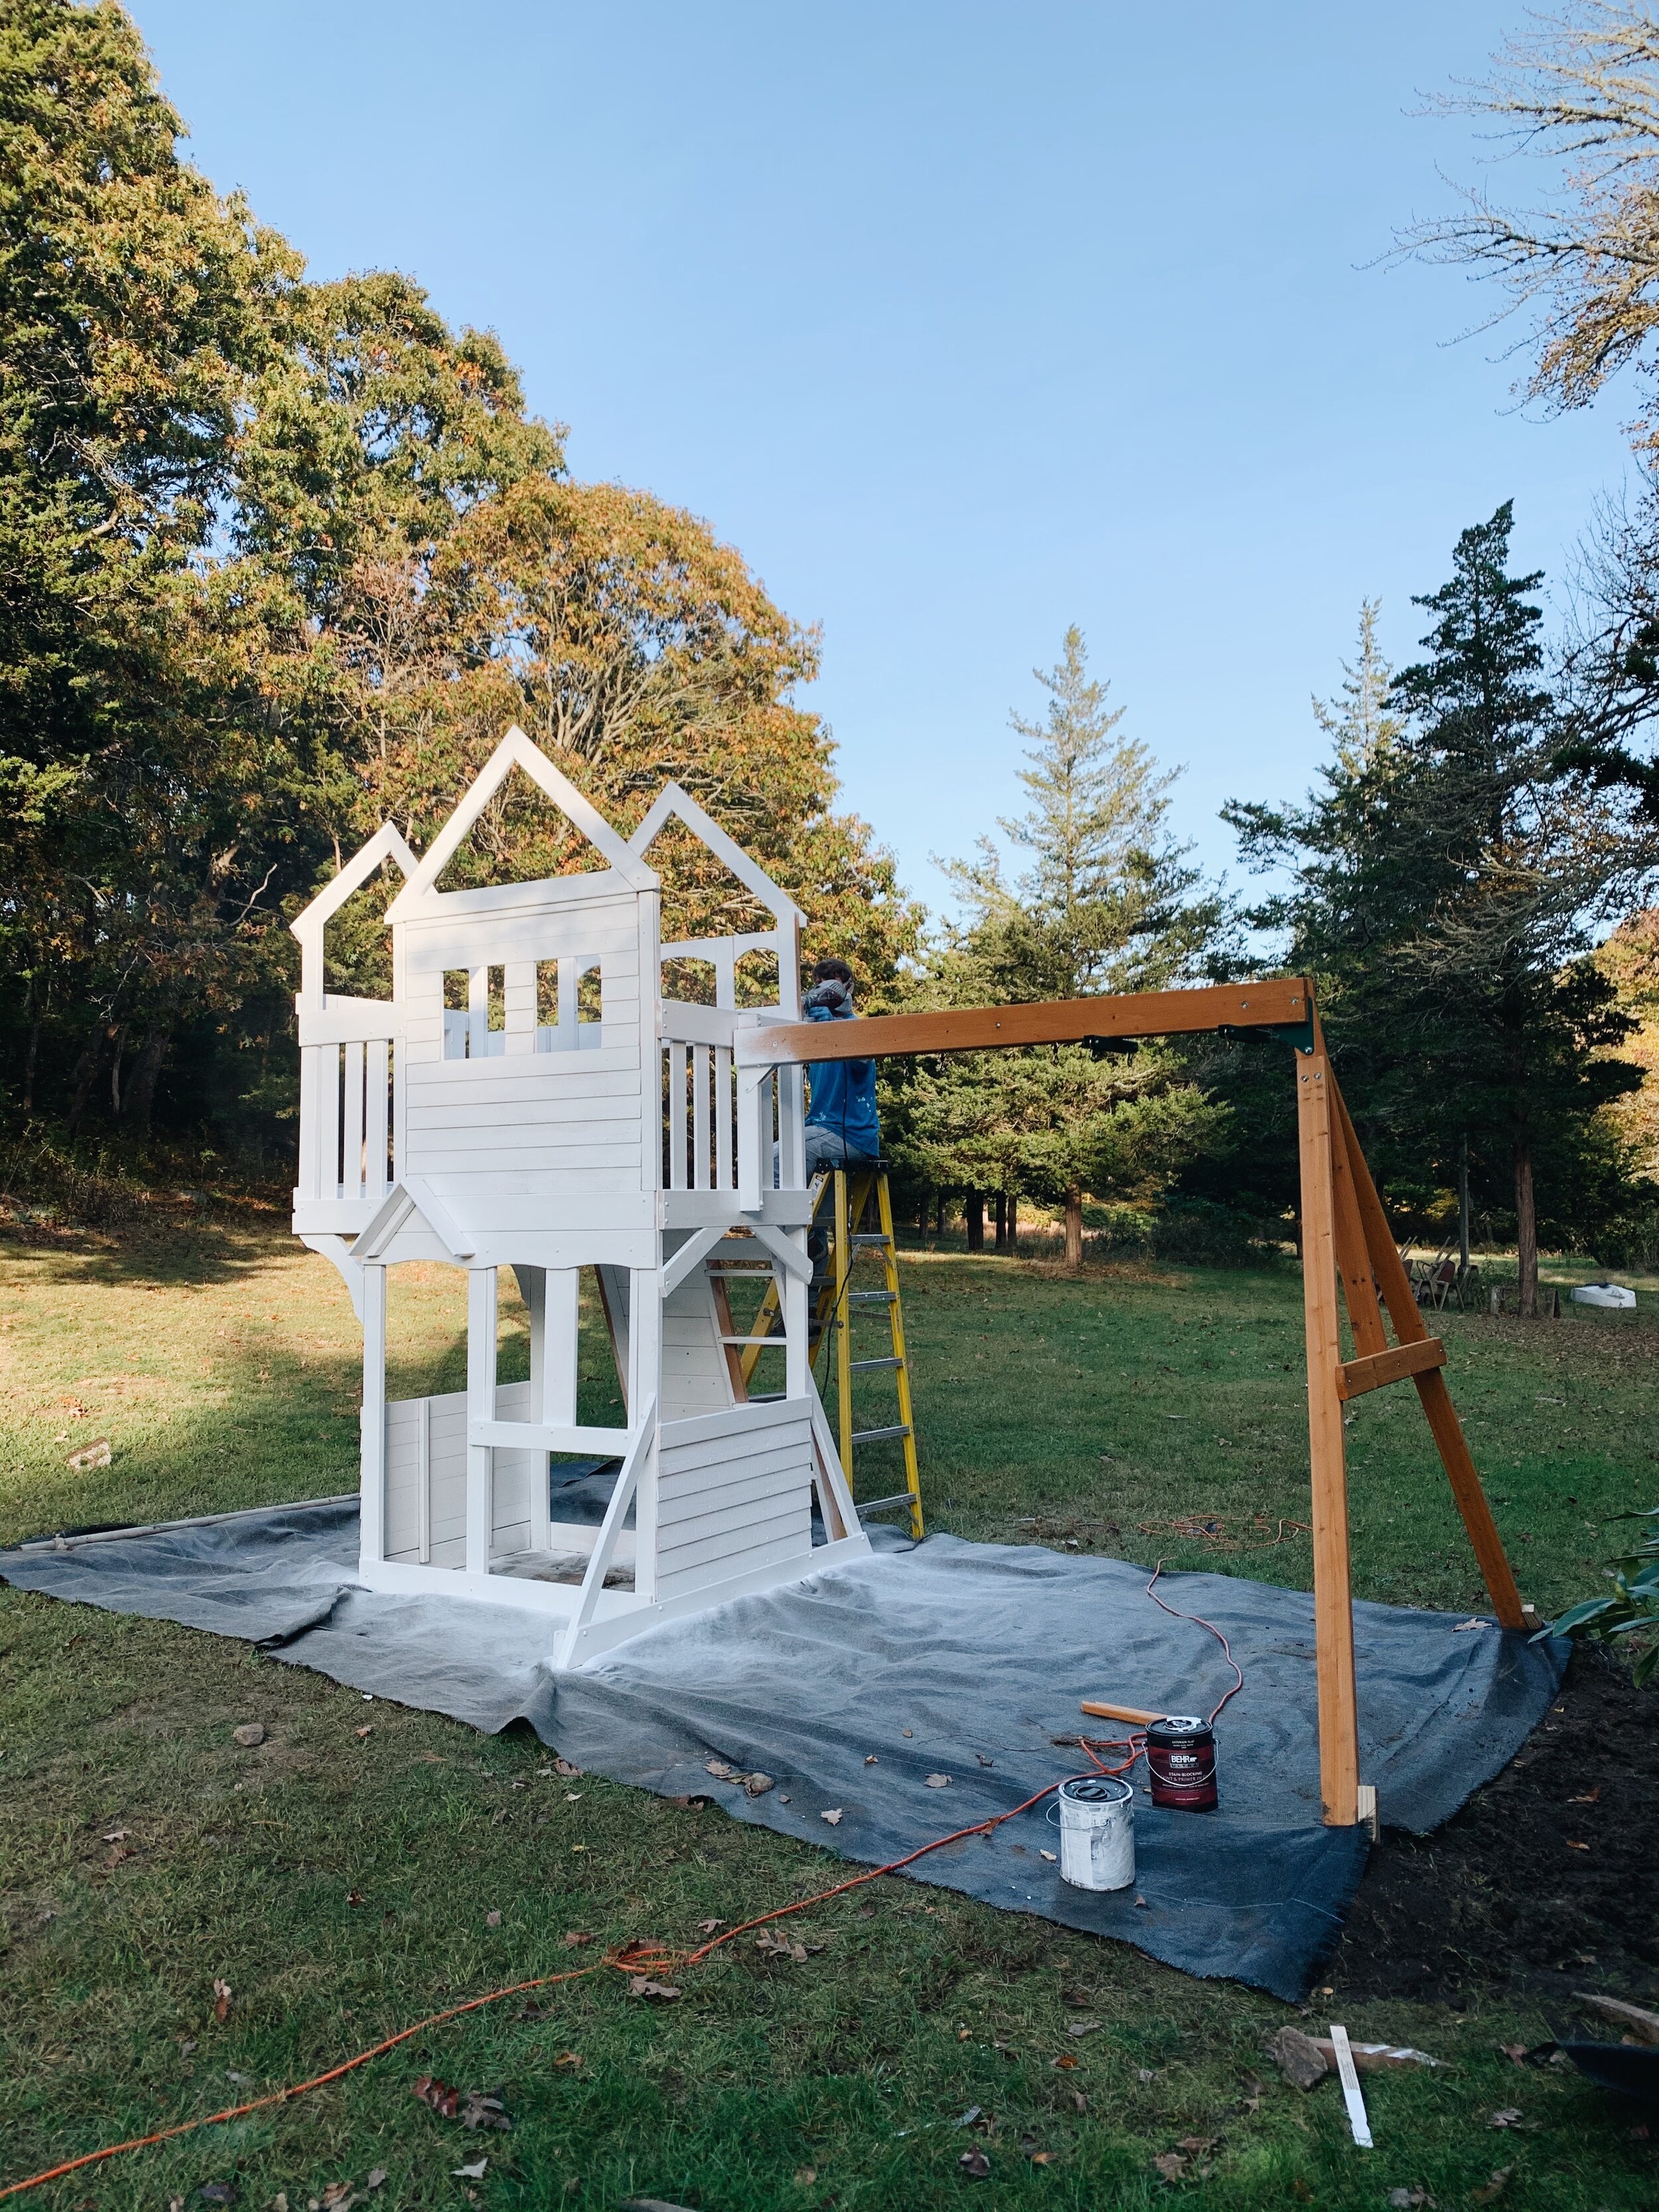
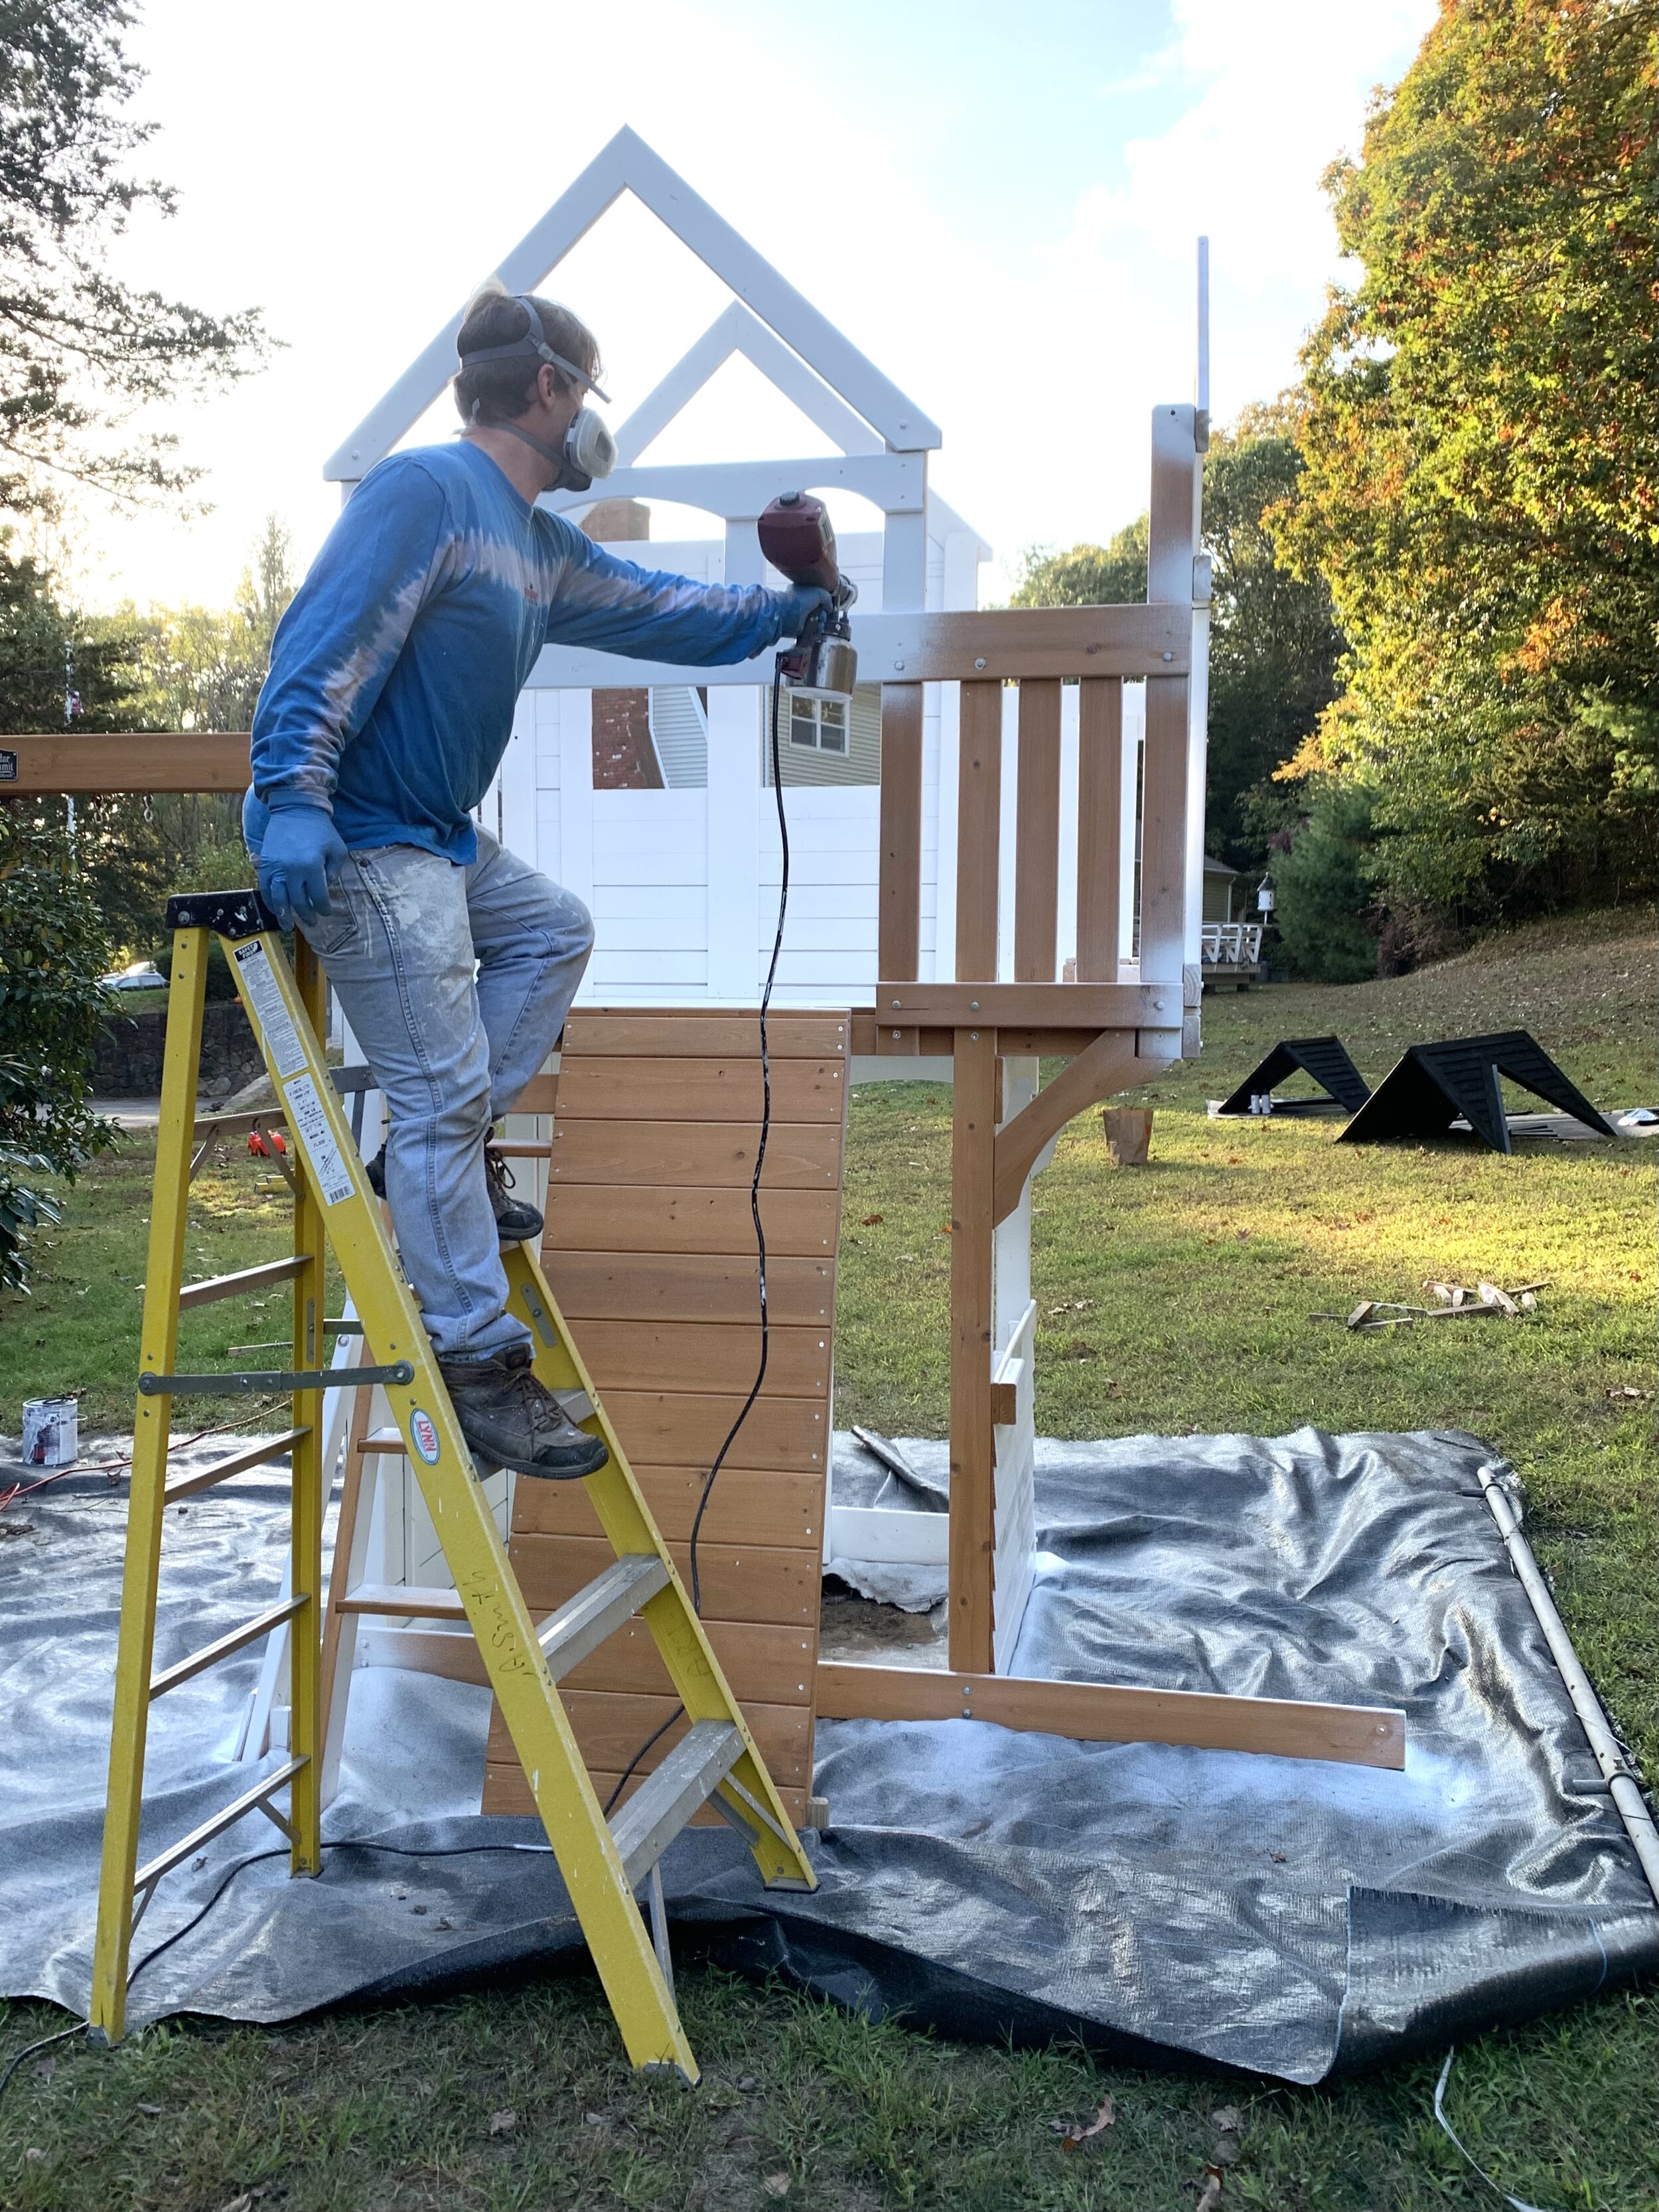
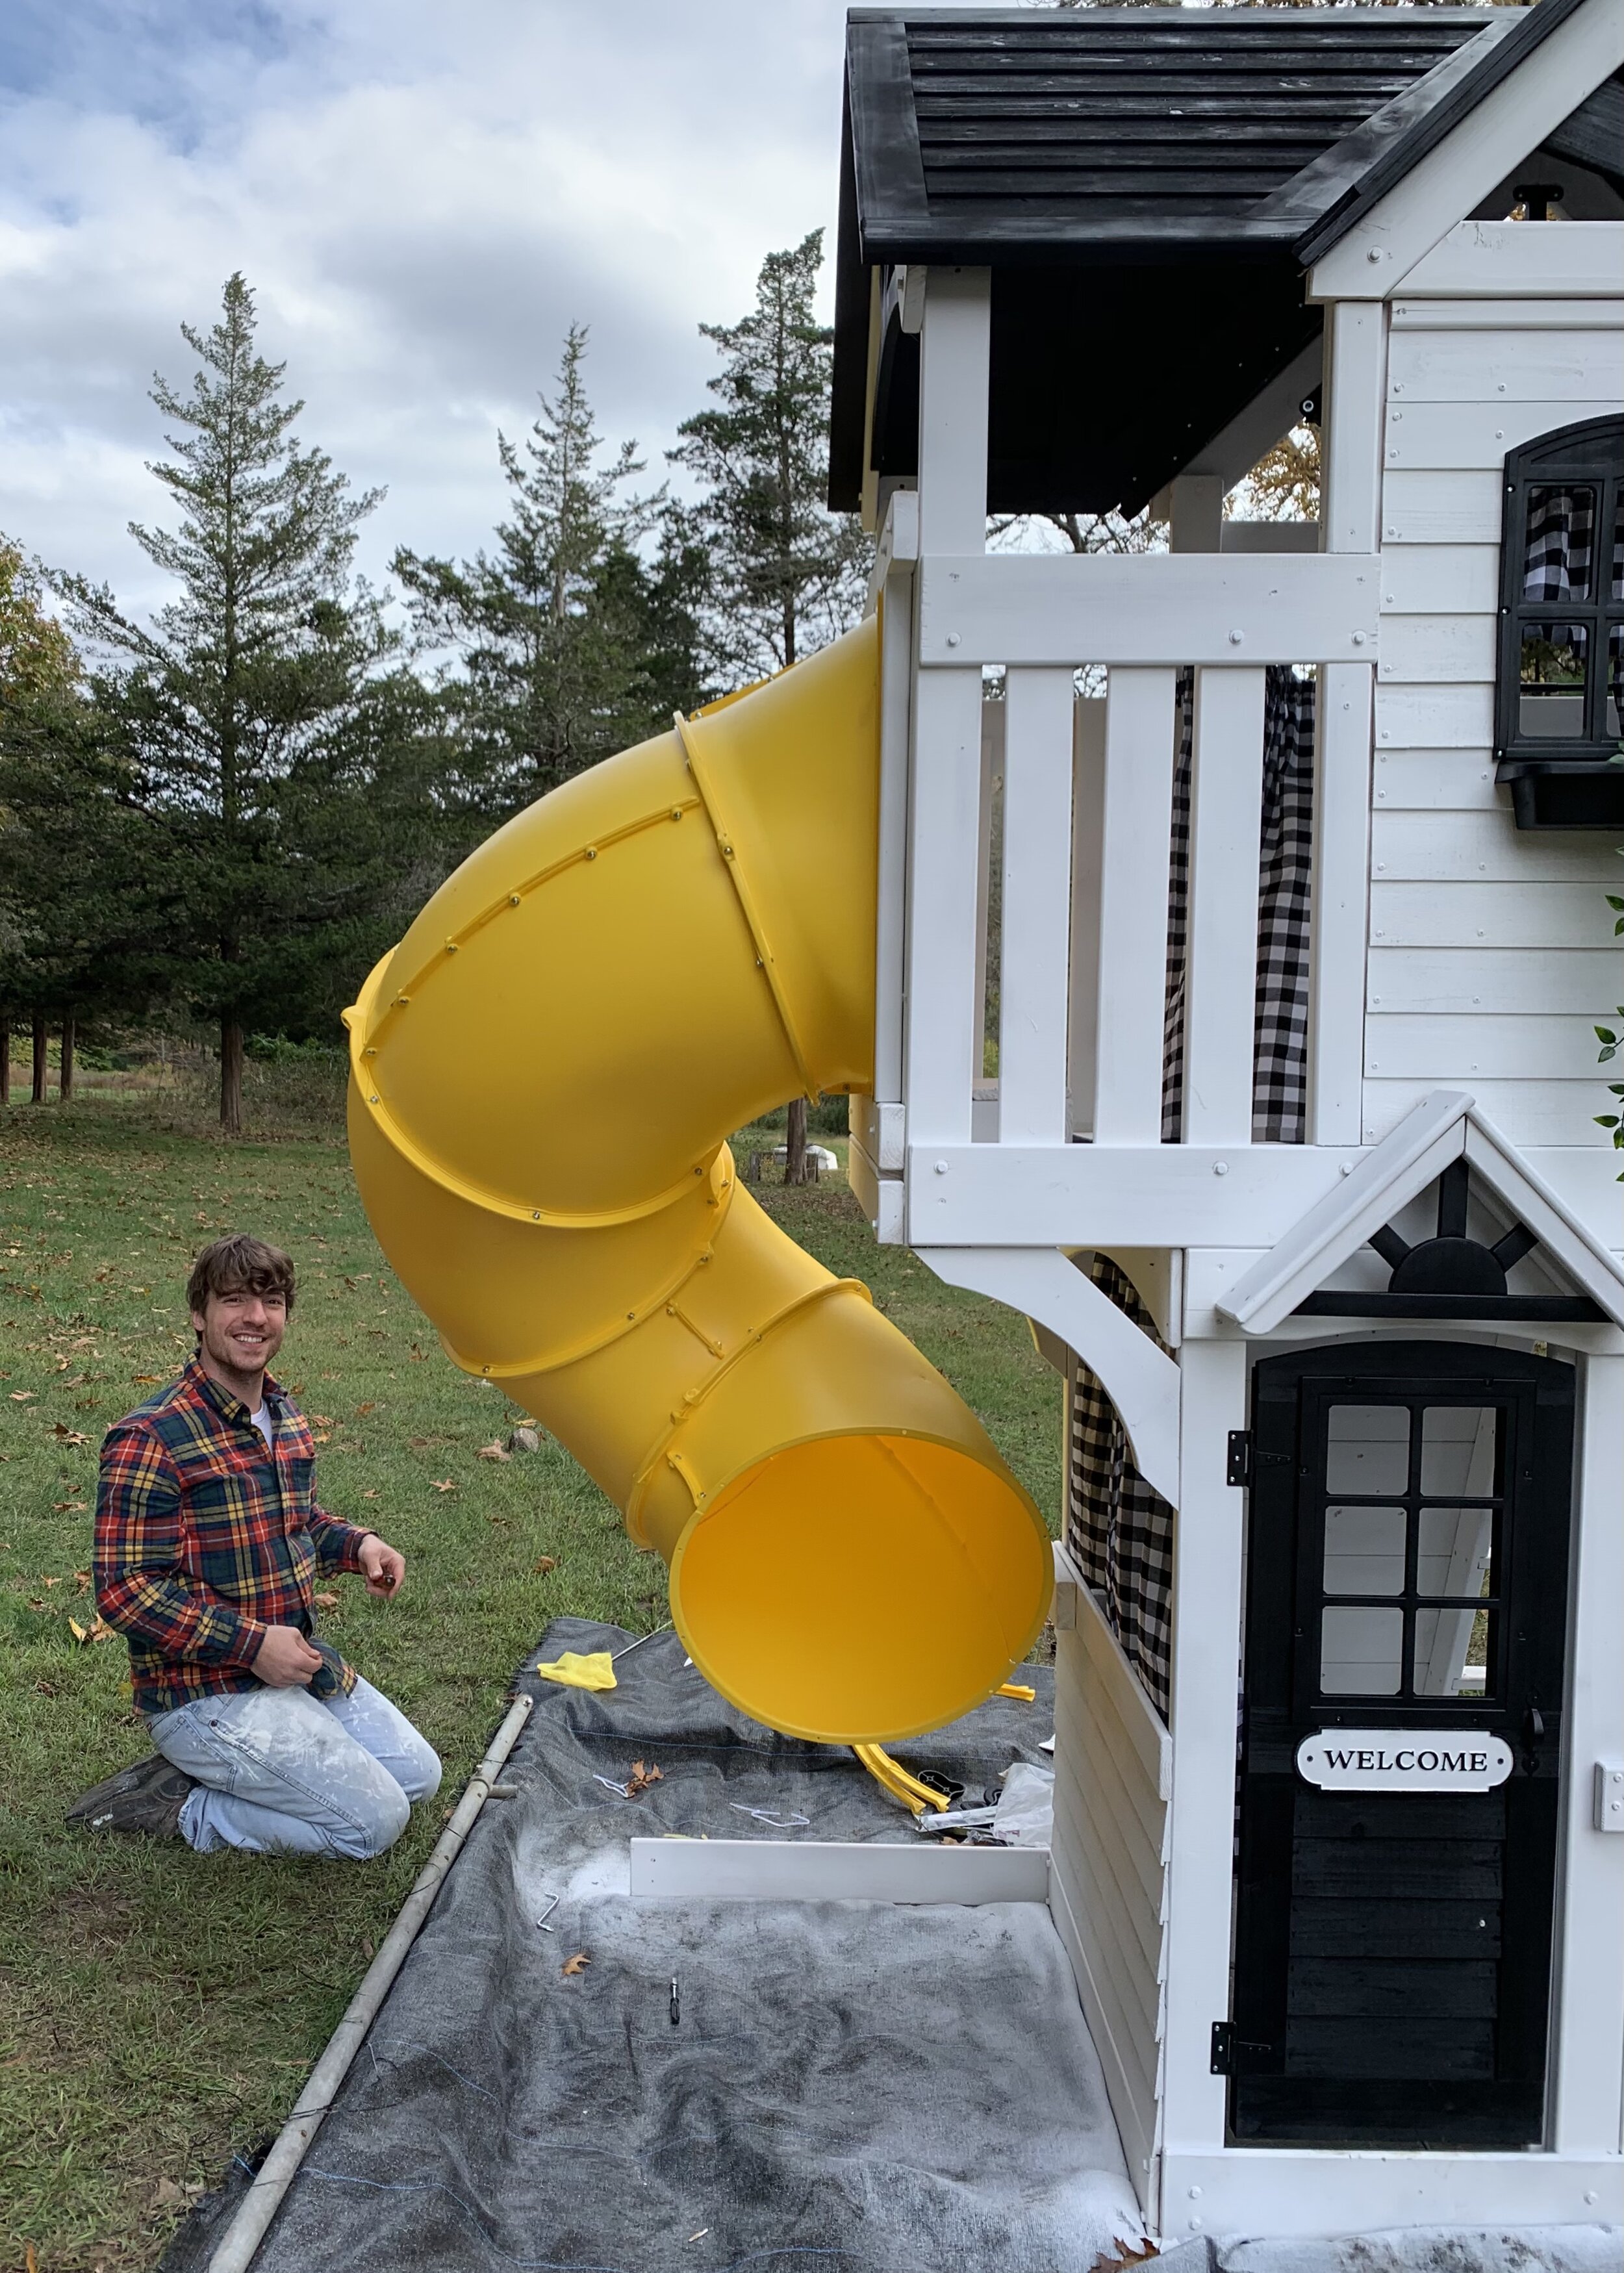
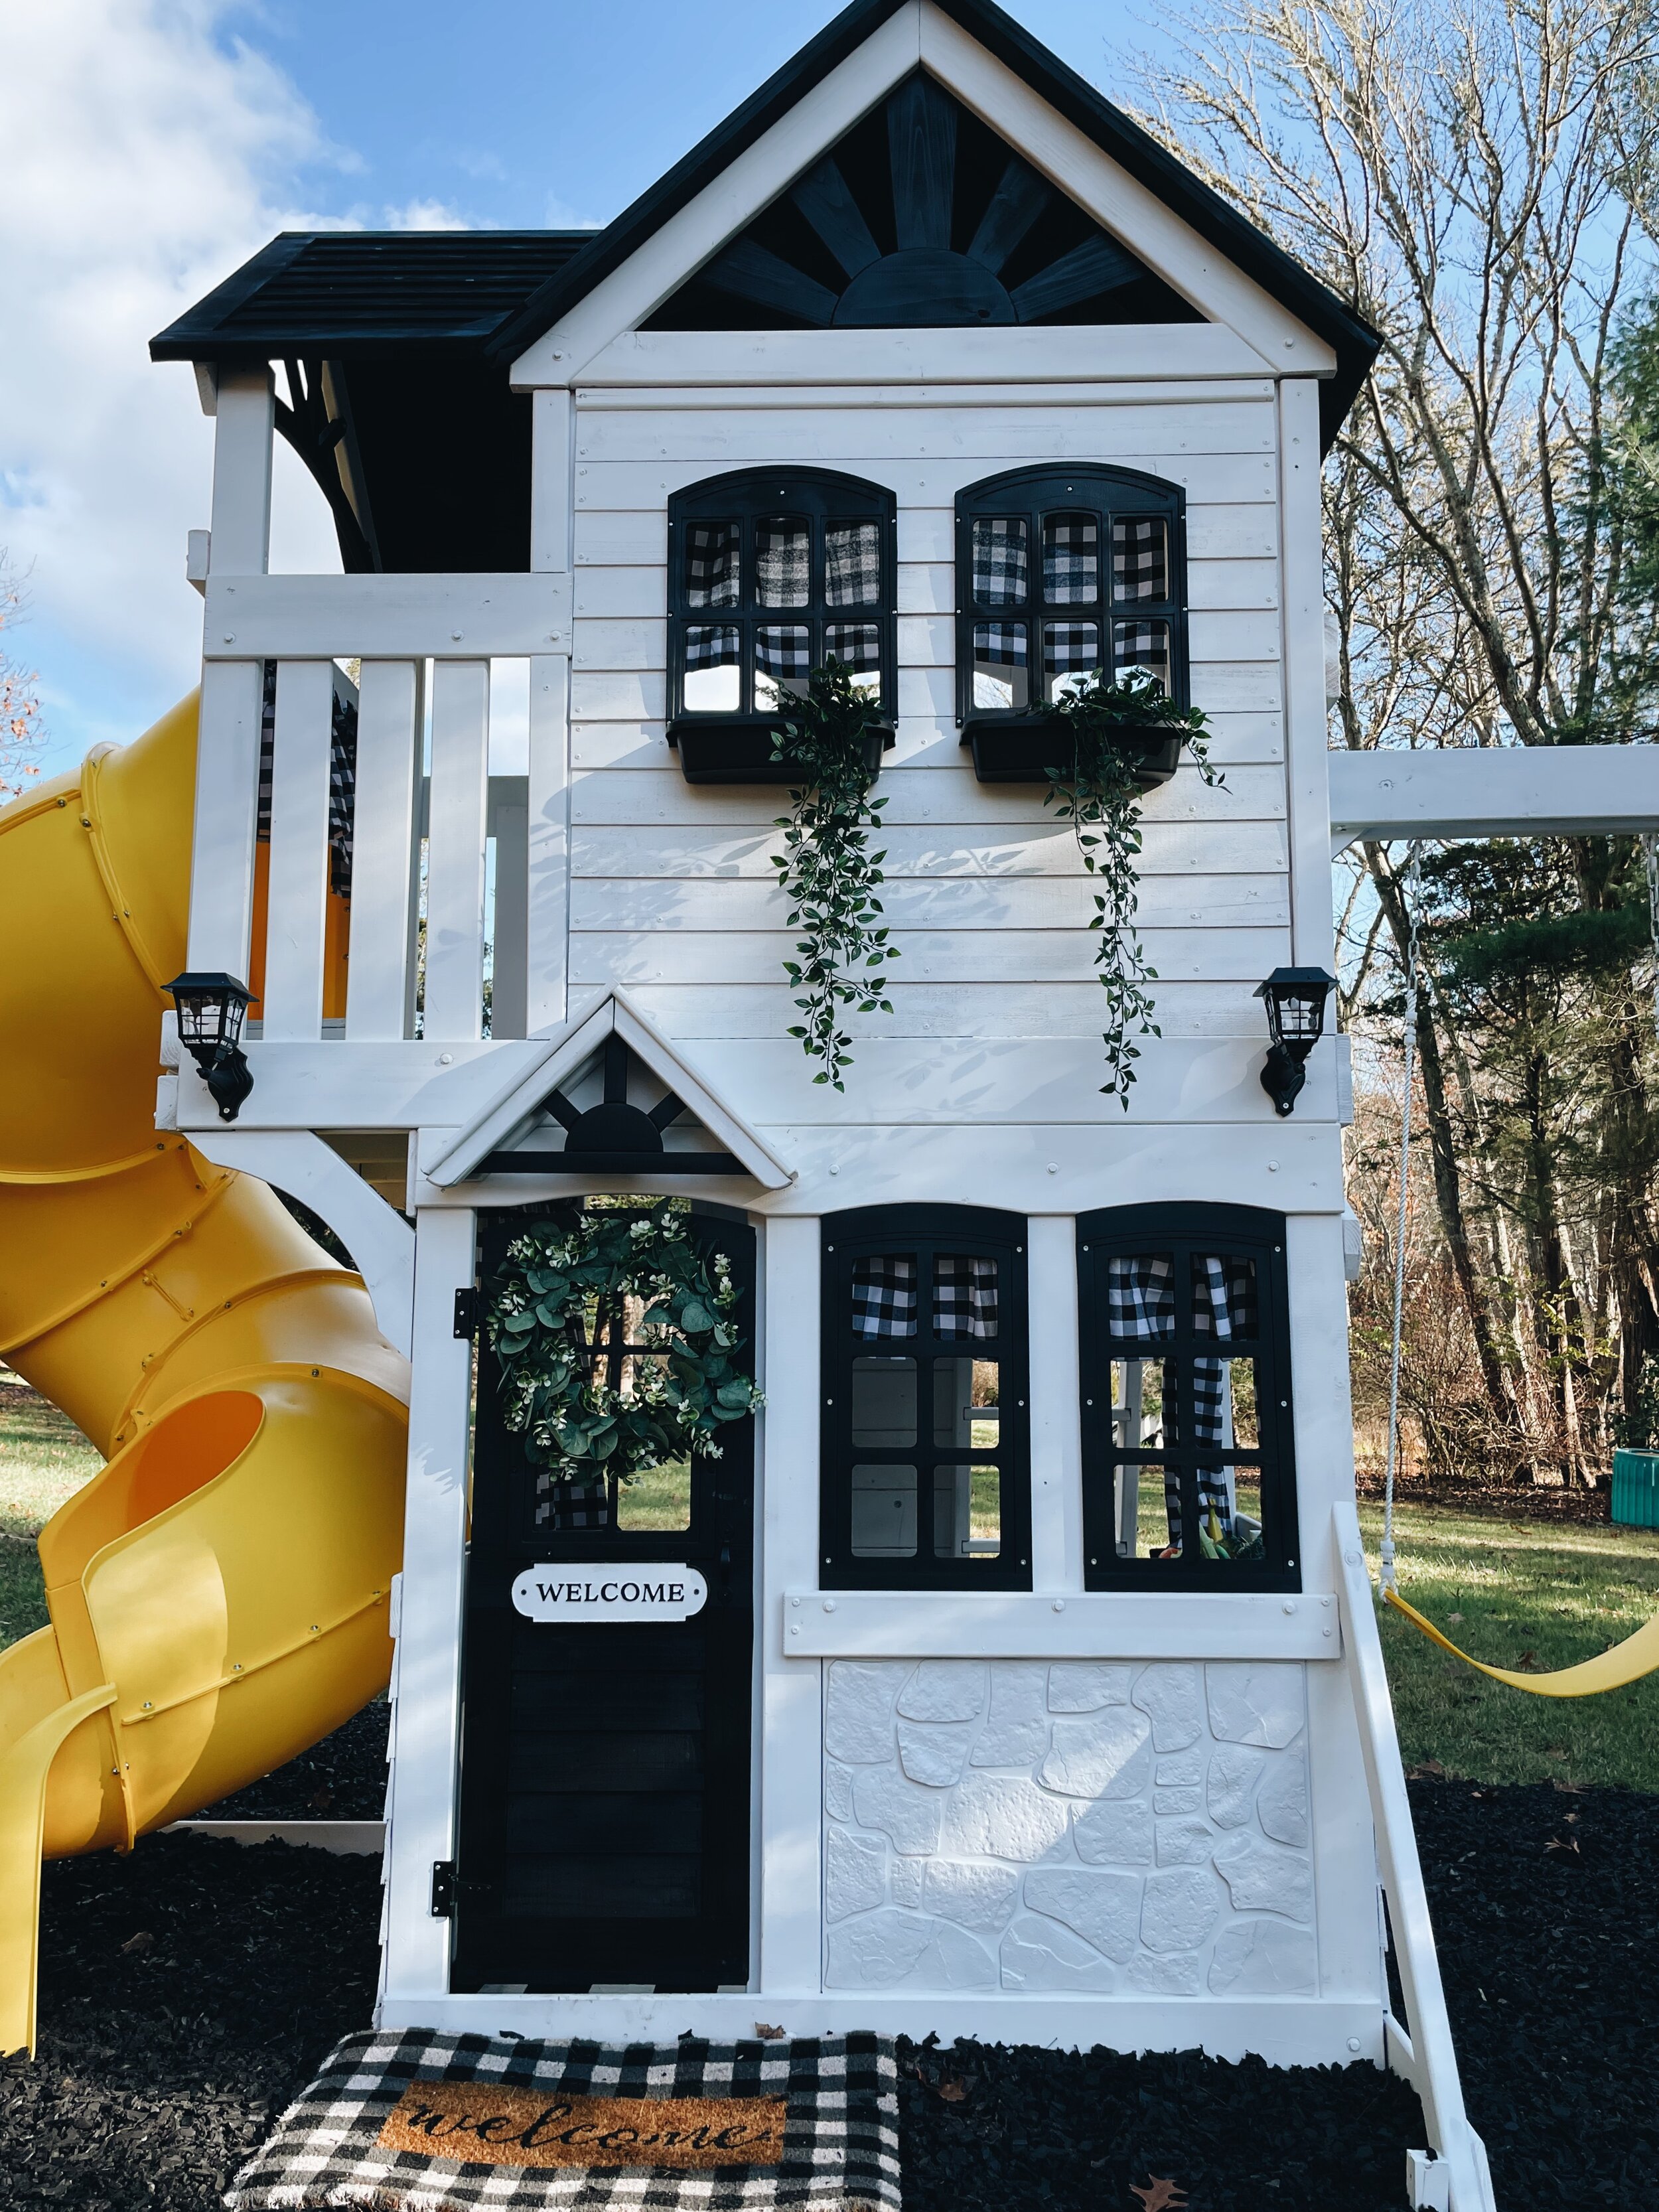
While Andrew was constructing the set, I painted all the accent pieces, like the roof, windows and doors, black with some flat black spray paint. I made sure to buy the one that was good for outdoor use! When the main structure was assembled, Andrew used his paint sprayer to paint it white. We got out paint sprayer from Sherwin-Williams, it is a Titan Flex Spray Handheld Disinfectant and Paint Sprayer. He used an exterior paint and primer in flat white. I highly recommend using a paint sprayer for this type of job, it is a big time-saver! Once everything was painted, we assembled the swings and slide! The kids were thrilled!
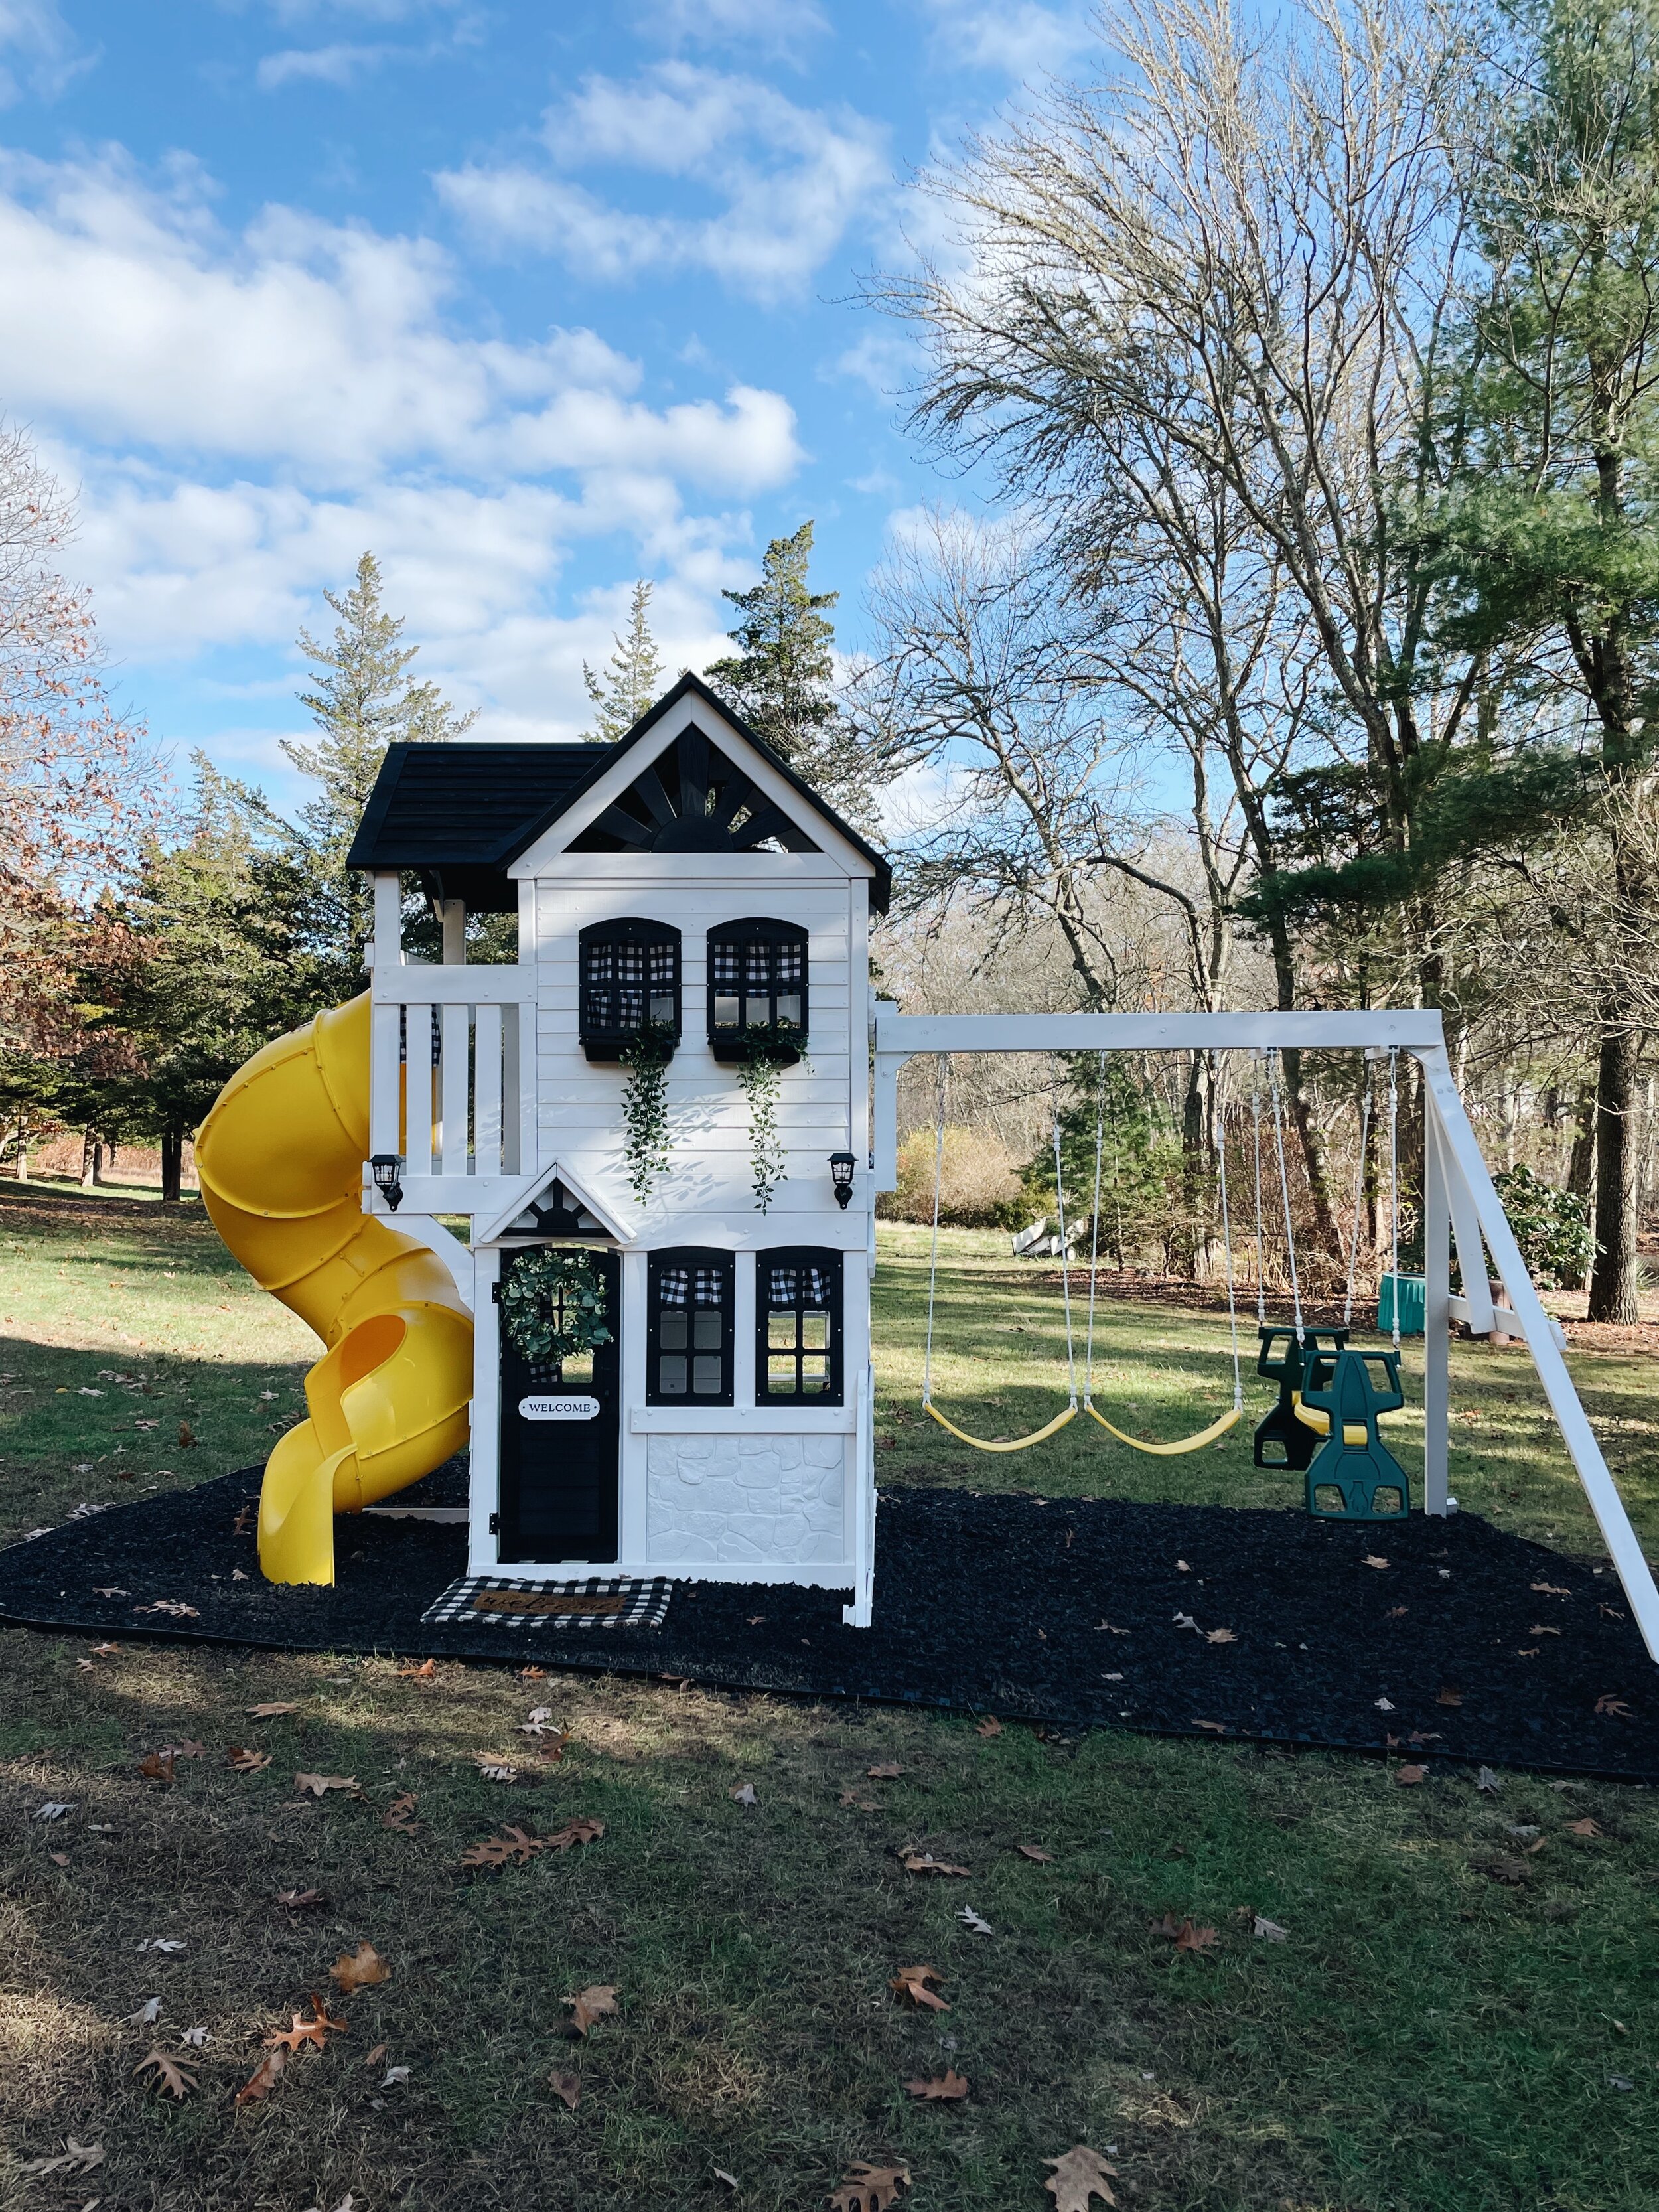
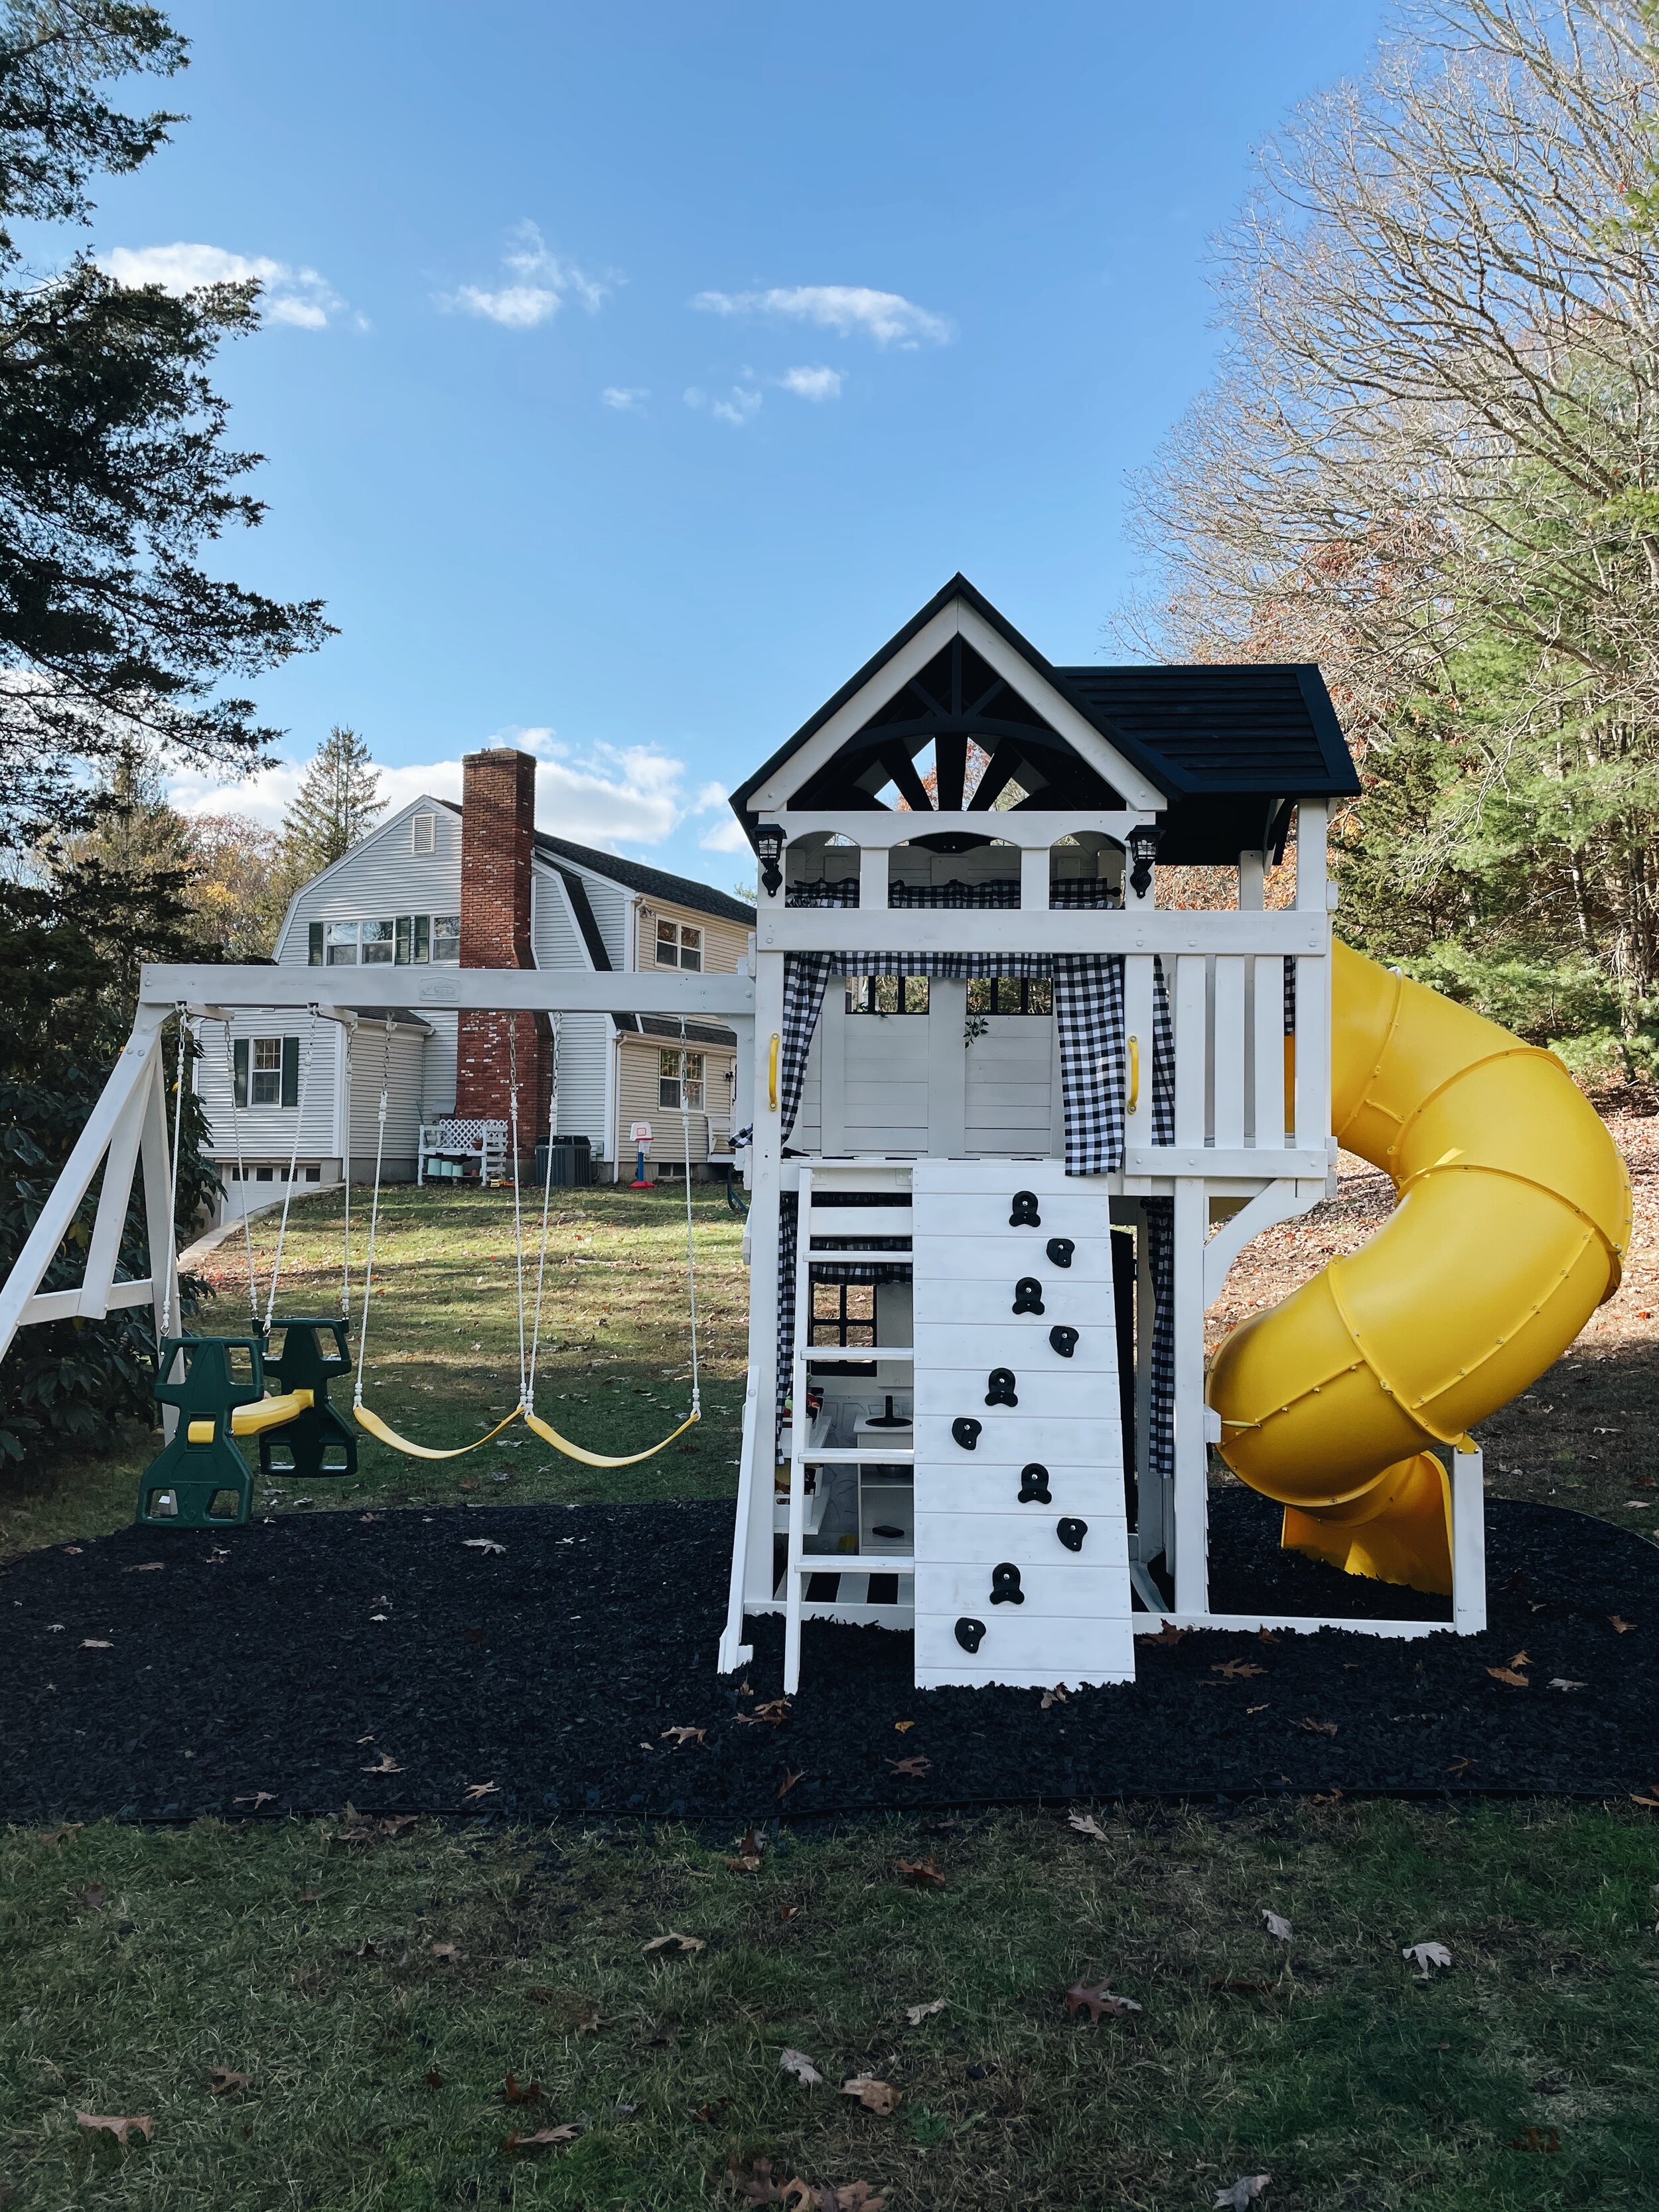
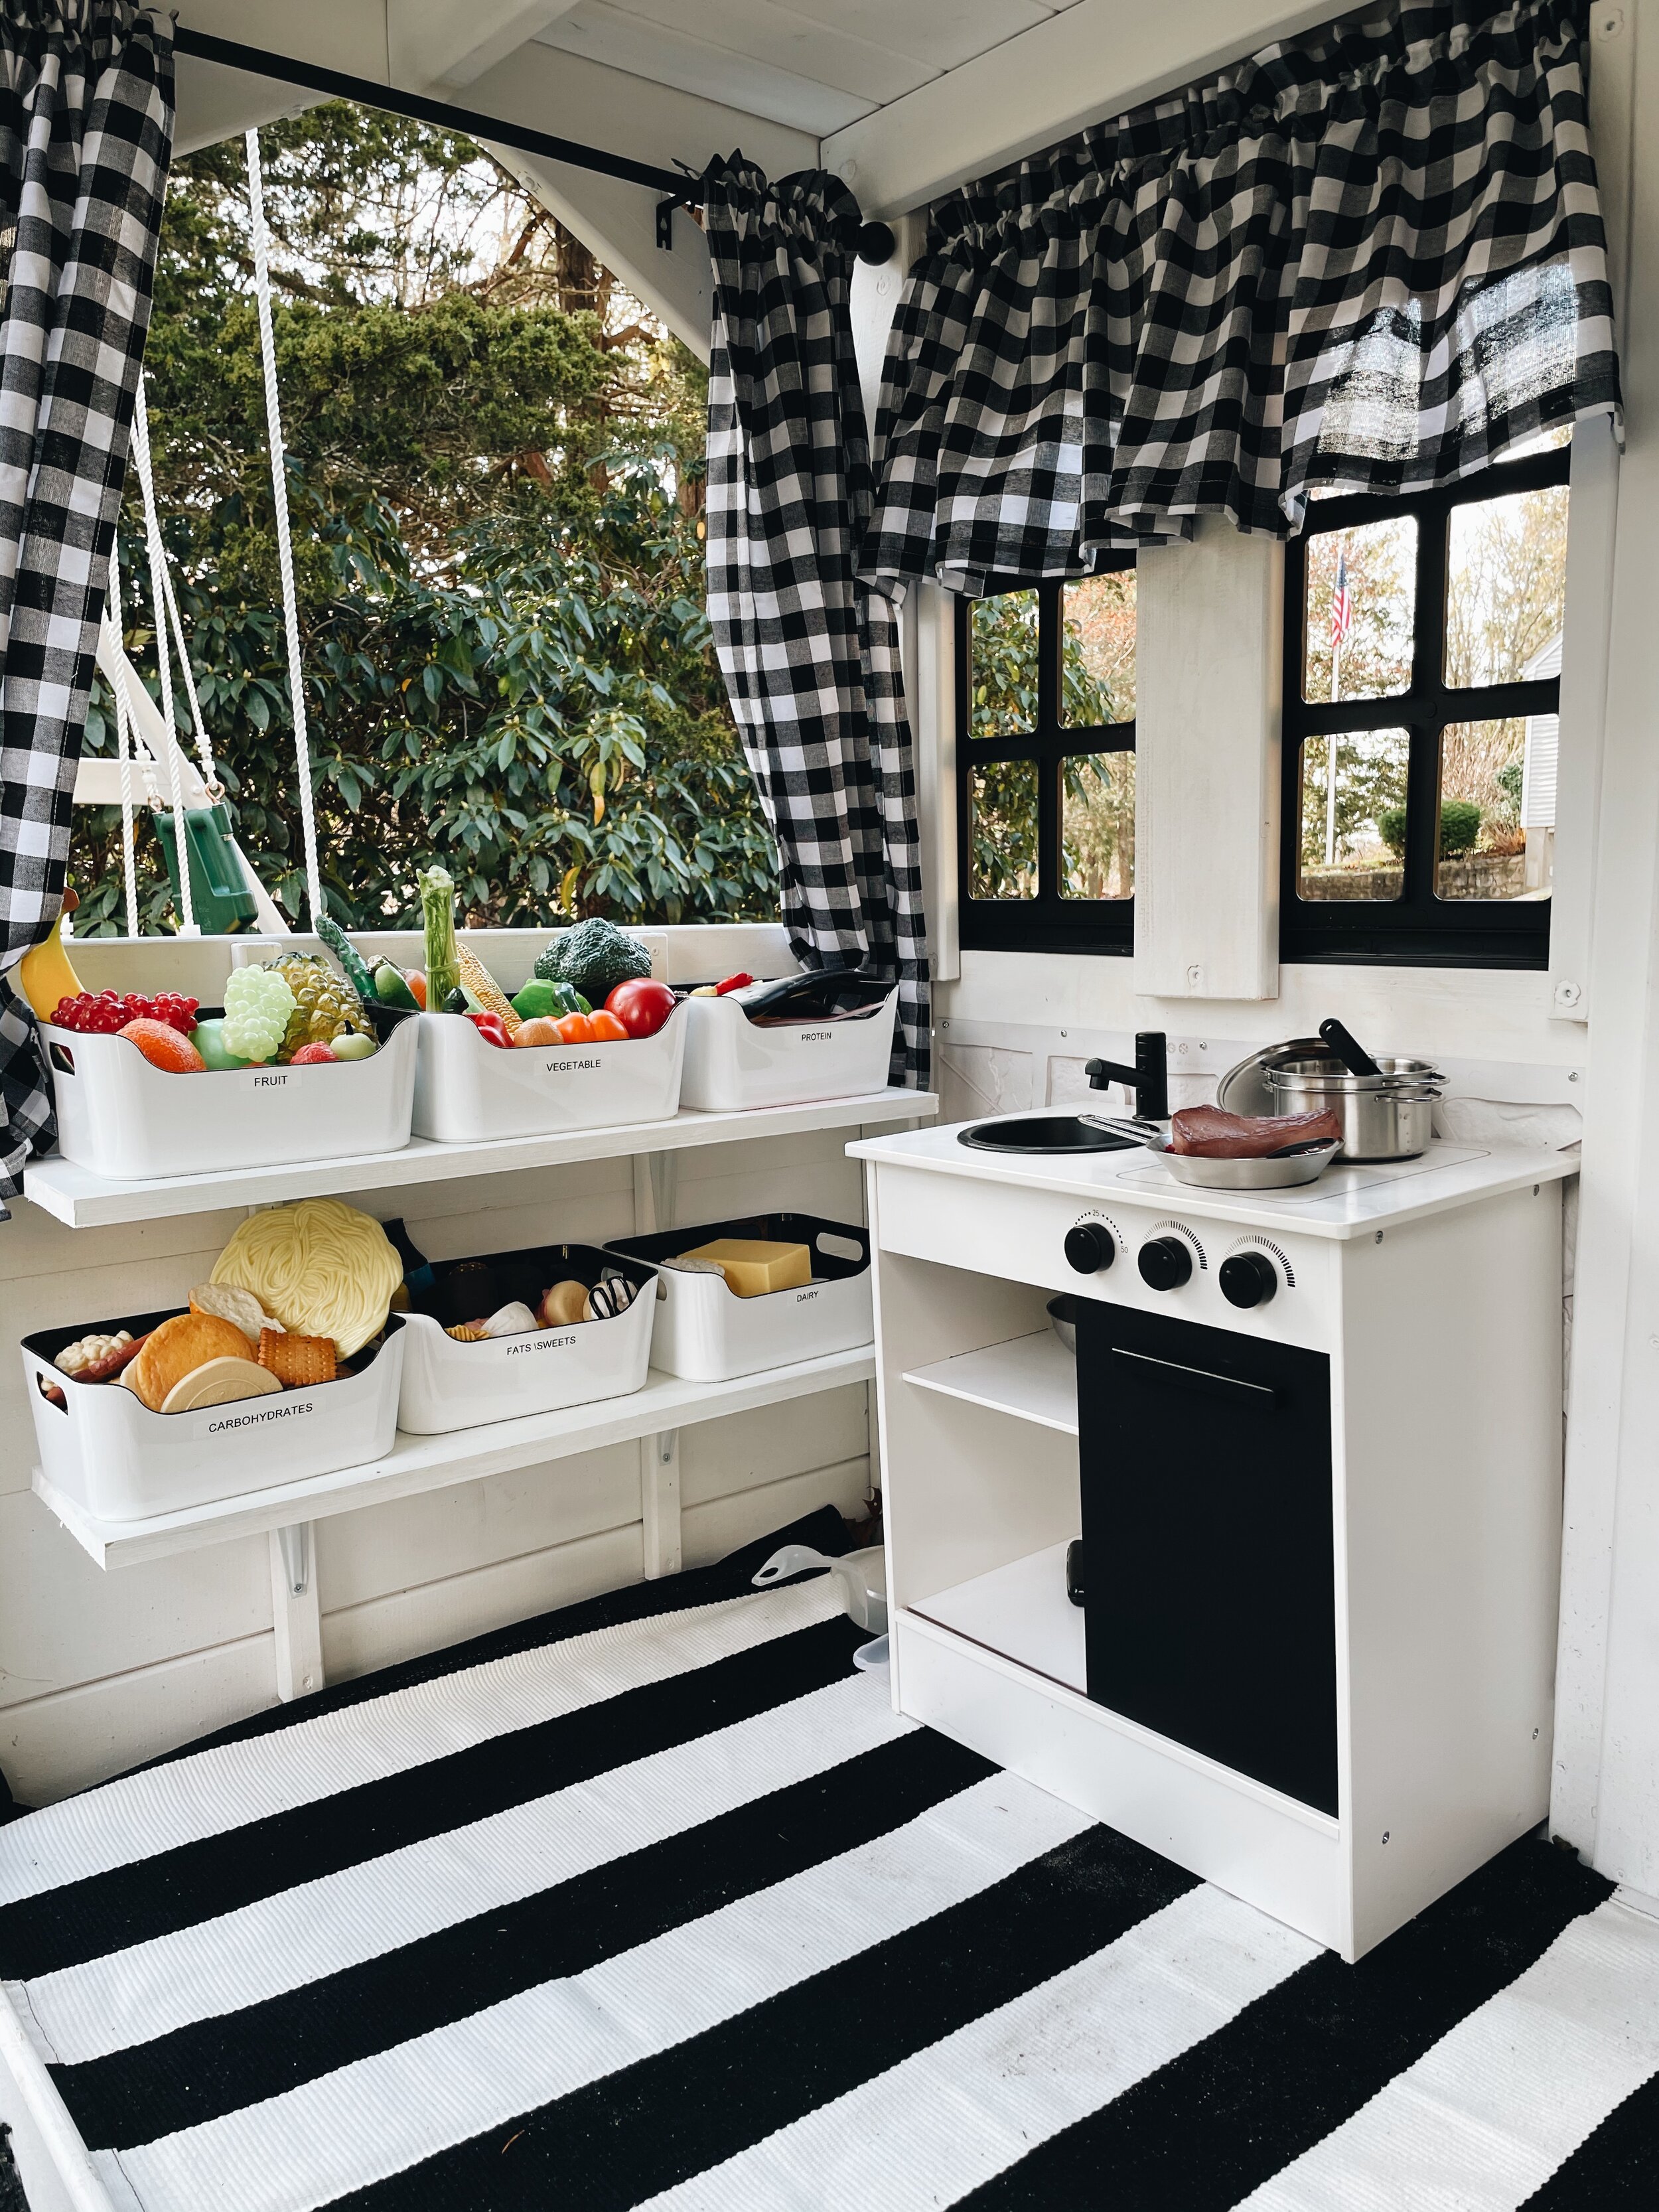
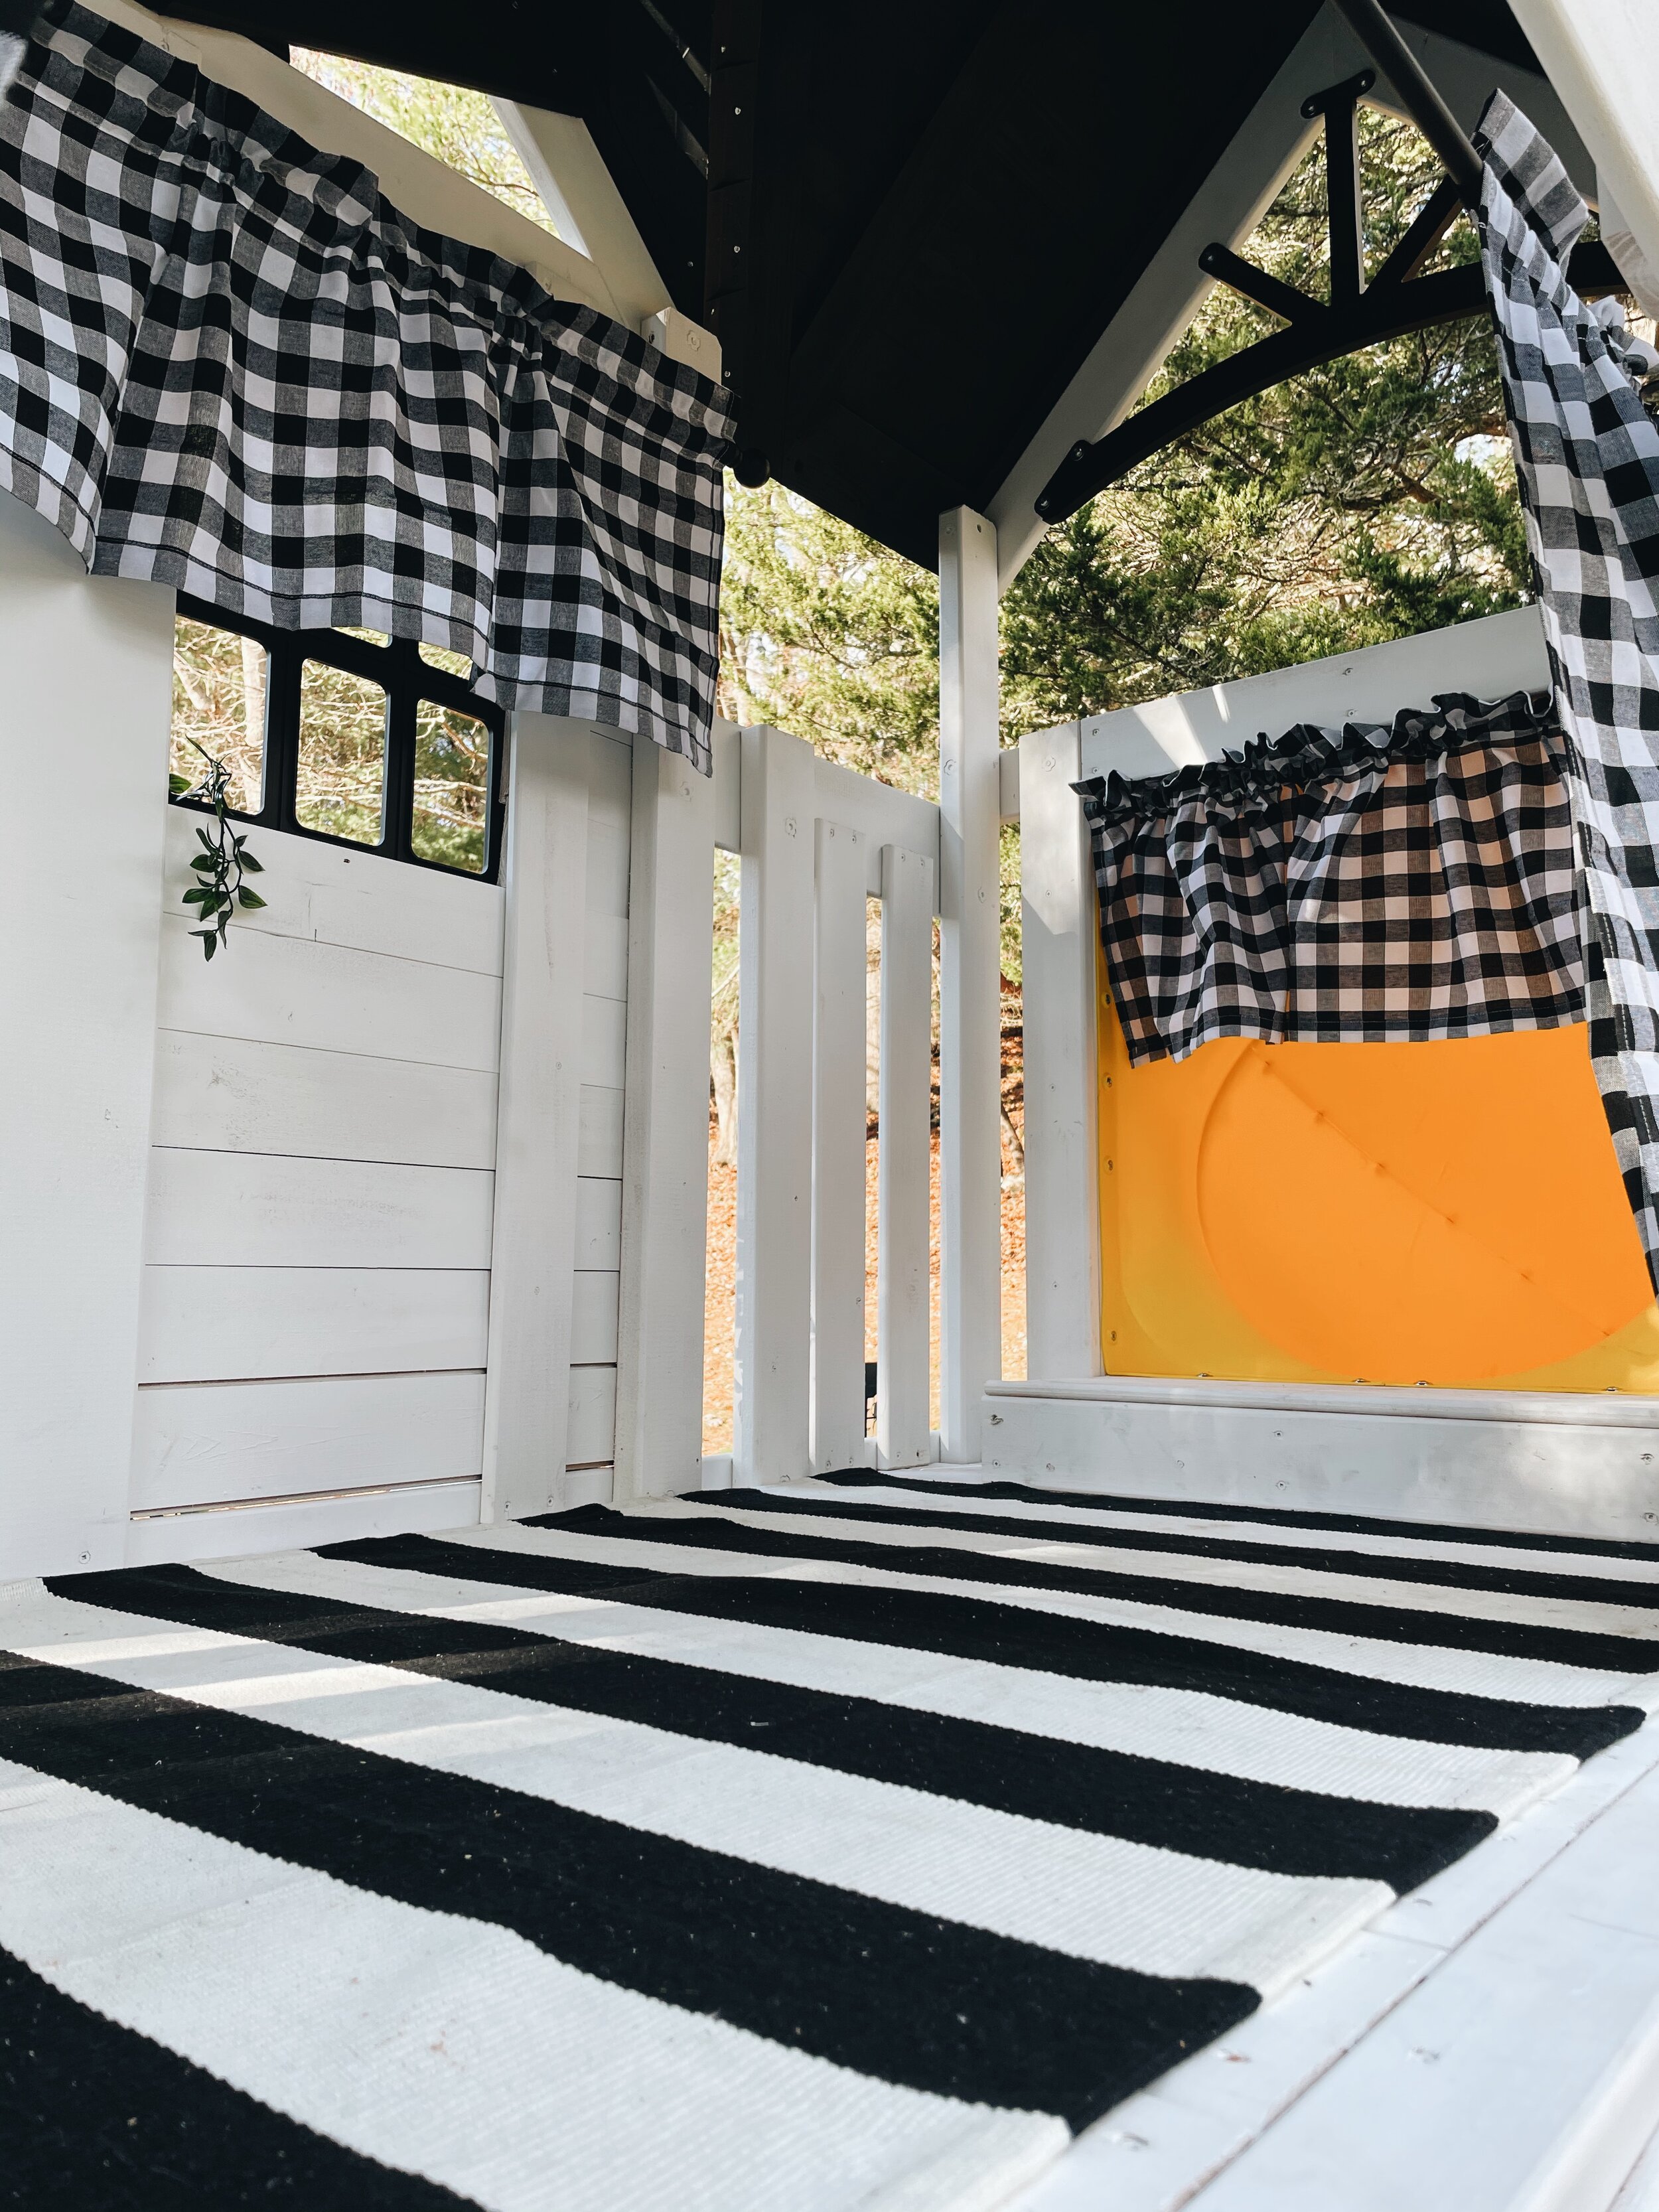
It was time to add the finishing touches! I bought a wreath, welcome sign, door mat, and solar lights for the exterior off Amazon. They elevated the basic style of the front to give it a more distinguished look. For the interior, I bought some outdoor rugs and some buffalo check plaid curtains to give it a warmer feel. I also bought a small play kitchen from IKEA for the inside and had Andrew install two shelves that he made with some pressure treated wood. The shelves were for the wonderful play food set that I bought for the kitchen! The last thing we did was lay black rubber mulch around the entire swing set so the kids could have a bouncy layer of padding to play on. We debated between sand, regular mulch, and rubber mulch for a while. Rubber mulch was the most expensive, but it won out in the end, because regular mulch splinters, and animals like to use sand as a litter box!
I am beyond excited with this DIY swing set makeover! It came out perfect and my wild littles love it so much. It keeps us out in the fresh air longer more than ever and their is nothing better than that!